Automobilista 2 Cars: различия между версиями
Перейти к навигации
Перейти к поиску
| (не показано 117 промежуточных версий этого же участника) | |||
| Строка 1: | Строка 1: | ||
| − | = | + | [[Файл:Back.png|link=Project GT#Information]] [[Файл:10060ams2.png|link=Automobilista 2 Cars]] [[Файл:10060wrc23.png|link=EA Sports WRC Cars]] |
| − | = | + | |
| + | =ARC Camaro= | ||
{| class="wikitable" style="text-align:center; style="font-size:90%; width="65%" | {| class="wikitable" style="text-align:center; style="font-size:90%; width="65%" | ||
| − | |rowspan= | + | |rowspan=9 style="width:250px"|[[File:Arc_camaro.png|link=]] |
|- | |- | ||
| + | !Displacement | ||
!Power | !Power | ||
| − | |||
!Torque | !Torque | ||
!Transmission | !Transmission | ||
|- | |- | ||
| − | | | + | |1.30l |
| − | | | + | |119hp |
| − | | | + | |115Nm |
| − | | | + | |6 speed Seqiential |
|- | |- | ||
!Electronics | !Electronics | ||
| − | |||
!Boost | !Boost | ||
!DRS | !DRS | ||
| + | !Weight | ||
|- | |- | ||
|no | |no | ||
|no | |no | ||
|no | |no | ||
| − | | | + | |595kg |
|- | |- | ||
!Onboard rollbars | !Onboard rollbars | ||
!Onboard brake bias | !Onboard brake bias | ||
!Pit limiter | !Pit limiter | ||
| − | ! | + | !Weight distribution |
|- | |- | ||
|no | |no | ||
|no | |no | ||
|yes | |yes | ||
| + | |53.0/47.0 | ||
| + | |- | ||
| + | !Turbo | ||
| + | !Headlights | ||
| + | !Wheelbase | ||
| + | ! | ||
| + | |- | ||
| + | |no | ||
|no | |no | ||
| + | |1.84m | ||
| + | | | ||
|- | |- | ||
|} | |} | ||
| − | == | + | =Copa Classic B Tier 1= |
| + | ==Chevrolet Chevette== | ||
{| class="wikitable" style="text-align:center; style="font-size:90%; width="65%" | {| class="wikitable" style="text-align:center; style="font-size:90%; width="65%" | ||
| − | |rowspan= | + | |rowspan=9 style="width:250px"|[[File:250chevette.png|link=]] |
|- | |- | ||
| + | !Displacement | ||
!Power | !Power | ||
| − | |||
!Torque | !Torque | ||
!Transmission | !Transmission | ||
|- | |- | ||
| − | | | + | |1.60l |
| − | | | + | |123hp |
| − | | | + | |125Nm |
| − | | | + | |5 speed H-Pattern |
|- | |- | ||
!Electronics | !Electronics | ||
| − | |||
!Boost | !Boost | ||
!DRS | !DRS | ||
| + | !Weight | ||
|- | |- | ||
|no | |no | ||
|no | |no | ||
|no | |no | ||
| − | | | + | |900kg |
|- | |- | ||
!Onboard rollbars | !Onboard rollbars | ||
!Onboard brake bias | !Onboard brake bias | ||
!Pit limiter | !Pit limiter | ||
| − | ! | + | !Weight distribution |
|- | |- | ||
|no | |no | ||
|no | |no | ||
|yes | |yes | ||
| + | |53.8/46.2 | ||
| + | |- | ||
| + | !Turbo | ||
| + | !Headlights | ||
| + | !Wheelbase | ||
| + | ! | ||
| + | |- | ||
| + | |no | ||
|yes | |yes | ||
| + | |2.40m | ||
| + | | | ||
|- | |- | ||
|} | |} | ||
| − | == | + | ==Uno Classic B== |
{| class="wikitable" style="text-align:center; style="font-size:90%; width="65%" | {| class="wikitable" style="text-align:center; style="font-size:90%; width="65%" | ||
| − | |rowspan= | + | |rowspan=9 style="width:250px"|[[File:250uno_classicb.png|link=]] |
|- | |- | ||
| + | !Displacement | ||
!Power | !Power | ||
| − | |||
!Torque | !Torque | ||
!Transmission | !Transmission | ||
|- | |- | ||
| − | | | + | |1.60l |
| − | | | + | |127hp |
| − | | | + | |130Nm |
|5 speed H-Pattern | |5 speed H-Pattern | ||
|- | |- | ||
!Electronics | !Electronics | ||
| − | |||
!Boost | !Boost | ||
!DRS | !DRS | ||
| + | !Weight | ||
|- | |- | ||
|no | |no | ||
|no | |no | ||
|no | |no | ||
| − | | | + | |860kg |
|- | |- | ||
!Onboard rollbars | !Onboard rollbars | ||
!Onboard brake bias | !Onboard brake bias | ||
!Pit limiter | !Pit limiter | ||
| − | ! | + | !Weight distribution |
|- | |- | ||
|no | |no | ||
|no | |no | ||
|yes | |yes | ||
| − | | | + | |62.8/37.2 |
|- | |- | ||
| − | |} | + | !Turbo |
| + | !Headlights | ||
| + | !Wheelbase | ||
| + | ! | ||
| + | |- | ||
| + | |no | ||
| + | |yes | ||
| + | |2.35m | ||
| + | | | ||
| + | |- | ||
| + | |} | ||
| − | == | + | ==Gol Classic B== |
{| class="wikitable" style="text-align:center; style="font-size:90%; width="65%" | {| class="wikitable" style="text-align:center; style="font-size:90%; width="65%" | ||
| − | |rowspan= | + | |rowspan=9 style="width:250px"|[[File:250gol_classicb.png|link=]] |
|- | |- | ||
| + | !Displacement | ||
!Power | !Power | ||
| − | |||
!Torque | !Torque | ||
!Transmission | !Transmission | ||
|- | |- | ||
| − | | | + | |1.60l |
| − | | | + | |120hp |
| − | | | + | |123Nm |
| − | | | + | |5 speed H-Pattern |
|- | |- | ||
!Electronics | !Electronics | ||
| − | |||
!Boost | !Boost | ||
!DRS | !DRS | ||
| + | !Weight | ||
|- | |- | ||
|no | |no | ||
|no | |no | ||
|no | |no | ||
| − | | | + | |880kg |
|- | |- | ||
!Onboard rollbars | !Onboard rollbars | ||
!Onboard brake bias | !Onboard brake bias | ||
!Pit limiter | !Pit limiter | ||
| − | ! | + | !Weight distribution |
|- | |- | ||
|no | |no | ||
|no | |no | ||
|yes | |yes | ||
| − | | | + | |62.8/37.2 |
|- | |- | ||
| − | |} | + | !Turbo |
| − | + | !Headlights | |
| − | = | + | !Wheelbase |
| + | ! | ||
| + | |- | ||
| + | |no | ||
| + | |yes | ||
| + | |2.37m | ||
| + | | | ||
| + | |- | ||
| + | |} | ||
| + | |||
| + | ==Passat Classic B== | ||
{| class="wikitable" style="text-align:center; style="font-size:90%; width="65%" | {| class="wikitable" style="text-align:center; style="font-size:90%; width="65%" | ||
| − | |rowspan=9 style="width:250px"|[[File: | + | |rowspan=9 style="width:250px"|[[File:250pas_classicb.png|link=]] |
|- | |- | ||
!Displacement | !Displacement | ||
| Строка 153: | Строка 195: | ||
!Transmission | !Transmission | ||
|- | |- | ||
| − | | | + | |1.60l |
| − | | | + | |120hp |
| − | | | + | |123Nm |
| − | |5 speed | + | |5 speed H-Pattern |
|- | |- | ||
!Electronics | !Electronics | ||
| Строка 164: | Строка 206: | ||
|- | |- | ||
|no | |no | ||
| − | |||
|no | |no | ||
| − | | | + | |no |
| + | |920kg | ||
|- | |- | ||
!Onboard rollbars | !Onboard rollbars | ||
| Строка 173: | Строка 215: | ||
!Weight distribution | !Weight distribution | ||
|- | |- | ||
| + | |no | ||
| + | |no | ||
|yes | |yes | ||
| − | | | + | |62.8/37.2 |
| − | |||
| − | |||
|- | |- | ||
!Turbo | !Turbo | ||
| − | ! | + | !Headlights |
!Wheelbase | !Wheelbase | ||
! | ! | ||
|- | |- | ||
|no | |no | ||
| − | | | + | |yes |
| − | |2. | + | |2.43m |
| | | | ||
|- | |- | ||
|} | |} | ||
| − | + | ==Puma GTE== | |
| − | + | {| class="wikitable" style="text-align:center; style="font-size:90%; width="65%" | |
| − | + | |rowspan=9 style="width:250px"|[[File:250puma_gte.png|link=]] | |
| − | == | + | |- |
| − | {| class="wikitable" style="text-align:center; style="font-size:90%; width="65%" | + | !Displacement |
| − | |rowspan= | ||
| − | |- | ||
!Power | !Power | ||
| − | |||
!Torque | !Torque | ||
!Transmission | !Transmission | ||
|- | |- | ||
| − | | | + | |1.60l |
| − | | | + | |123hp |
| − | | | + | |131Nm |
| − | | | + | |4 speed H-Pattern |
|- | |- | ||
!Electronics | !Electronics | ||
| − | |||
!Boost | !Boost | ||
!DRS | !DRS | ||
| + | !Weight | ||
|- | |- | ||
| − | |||
| − | |||
|no | |no | ||
|no | |no | ||
| + | |no | ||
| + | |900kg | ||
|- | |- | ||
| − | !Onboard | + | !Onboard rollbars |
!Onboard brake bias | !Onboard brake bias | ||
!Pit limiter | !Pit limiter | ||
| − | ! | + | !Weight distribution |
|- | |- | ||
|no | |no | ||
|no | |no | ||
| − | | | + | |yes |
| − | | | + | |42.0/58.0 |
|- | |- | ||
| − | |} | + | !Turbo |
| + | !Headlights | ||
| + | !Wheelbase | ||
| + | ! | ||
| + | |- | ||
| + | |no | ||
| + | |yes | ||
| + | |2.15m | ||
| + | | | ||
| + | |- | ||
| + | |} | ||
| − | = | + | =Copa Classic FL Tier 2= |
| − | + | ==Fusca FL== | |
| − | == | ||
{| class="wikitable" style="text-align:center; style="font-size:90%; width="65%" | {| class="wikitable" style="text-align:center; style="font-size:90%; width="65%" | ||
| − | |rowspan=7 style="width:250px"|[[File: | + | |rowspan=7 style="width:250px"|[[File:250fuscahc2.png|link=]] |
|- | |- | ||
!Power | !Power | ||
| Строка 240: | Строка 288: | ||
!Transmission | !Transmission | ||
|- | |- | ||
| − | | | + | |170hp |
| − | | | + | |920kg |
| − | | | + | |180Nm |
| − | | | + | |4 speed H-Pattern |
|- | |- | ||
!Electronics | !Electronics | ||
| Строка 258: | Строка 306: | ||
!Onboard brake bias | !Onboard brake bias | ||
!Pit limiter | !Pit limiter | ||
| − | ! | + | !Headlights |
|- | |- | ||
|no | |no | ||
| Строка 267: | Строка 315: | ||
|} | |} | ||
| − | == | + | ==Gol Classic FL== |
{| class="wikitable" style="text-align:center; style="font-size:90%; width="65%" | {| class="wikitable" style="text-align:center; style="font-size:90%; width="65%" | ||
| − | |rowspan=7 style="width:250px"|[[File: | + | |rowspan=7 style="width:250px"|[[File:250golhc2.png|link=]] |
|- | |- | ||
!Power | !Power | ||
| Строка 276: | Строка 324: | ||
!Transmission | !Transmission | ||
|- | |- | ||
| − | | | + | |170hp |
| − | | | + | |880kg |
| − | | | + | |200Nm |
| − | | | + | |4 speed H-Pattern |
|- | |- | ||
!Electronics | !Electronics | ||
| Строка 294: | Строка 342: | ||
!Onboard brake bias | !Onboard brake bias | ||
!Pit limiter | !Pit limiter | ||
| − | ! | + | !Headlights |
|- | |- | ||
|no | |no | ||
|no | |no | ||
|yes | |yes | ||
| − | | | + | |yes |
|- | |- | ||
|} | |} | ||
| − | = | + | ==Passat Classic FL== |
| − | |||
| − | |||
{| class="wikitable" style="text-align:center; style="font-size:90%; width="65%" | {| class="wikitable" style="text-align:center; style="font-size:90%; width="65%" | ||
| − | |rowspan= | + | |rowspan=7 style="width:250px"|[[File:250pashc2.png|link=]] |
|- | |- | ||
| − | |||
!Power | !Power | ||
| + | !Weight | ||
!Torque | !Torque | ||
!Transmission | !Transmission | ||
|- | |- | ||
| − | | | + | |170hp |
| − | | | + | |925kg |
| − | | | + | |200Nm |
| − | | | + | |5 speed H-Pattern |
|- | |- | ||
!Electronics | !Electronics | ||
| + | !Turbo | ||
!Boost | !Boost | ||
!DRS | !DRS | ||
| − | |||
|- | |- | ||
|no | |no | ||
|no | |no | ||
|no | |no | ||
| − | | | + | |no |
|- | |- | ||
!Onboard rollbars | !Onboard rollbars | ||
!Onboard brake bias | !Onboard brake bias | ||
!Pit limiter | !Pit limiter | ||
| − | ! | + | !Headlights |
|- | |- | ||
|no | |no | ||
|no | |no | ||
|yes | |yes | ||
| − | | | + | |yes |
| − | |||
| − | |||
| − | |||
| − | |||
| − | |||
| − | |||
| − | |||
| − | |||
| − | |||
| − | |||
|- | |- | ||
|} | |} | ||
| − | == | + | ==Puma GTB== |
{| class="wikitable" style="text-align:center; style="font-size:90%; width="65%" | {| class="wikitable" style="text-align:center; style="font-size:90%; width="65%" | ||
| − | |rowspan= | + | |rowspan=7 style="width:250px"|[[File:250pumagtb.png|link=]] |
|- | |- | ||
| − | |||
!Power | !Power | ||
| + | !Weight | ||
!Torque | !Torque | ||
!Transmission | !Transmission | ||
|- | |- | ||
| − | | | + | |190hp |
| − | | | + | |1080kg |
| − | | | + | |300Nm |
|4 speed H-Pattern | |4 speed H-Pattern | ||
|- | |- | ||
!Electronics | !Electronics | ||
| + | !Turbo | ||
!Boost | !Boost | ||
!DRS | !DRS | ||
| − | |||
|- | |- | ||
|no | |no | ||
|no | |no | ||
|no | |no | ||
| − | | | + | |no |
|- | |- | ||
!Onboard rollbars | !Onboard rollbars | ||
!Onboard brake bias | !Onboard brake bias | ||
!Pit limiter | !Pit limiter | ||
| − | ! | + | !Headlights |
|- | |- | ||
|no | |no | ||
|no | |no | ||
|yes | |yes | ||
| − | | | + | |yes |
|- | |- | ||
| − | + | |} | |
| − | |||
| − | |||
| − | |||
| − | |||
| − | |||
| − | |||
| − | |||
| − | |||
| − | |||
| − | |} | ||
| − | = | + | =Copa Fusca= |
| − | |||
| − | |||
{| class="wikitable" style="text-align:center; style="font-size:90%; width="65%" | {| class="wikitable" style="text-align:center; style="font-size:90%; width="65%" | ||
| − | |rowspan= | + | |rowspan=9 style="width:250px"|[[File:250fusca_copa.png|link=]] |
|- | |- | ||
| + | !Displacement | ||
!Power | !Power | ||
| − | |||
!Torque | !Torque | ||
!Transmission | !Transmission | ||
|- | |- | ||
| − | | | + | |1.60l |
| − | | | + | |123hp |
| − | | | + | |131Nm |
| − | | | + | |4 speed H-Pattern |
|- | |- | ||
!Electronics | !Electronics | ||
| − | |||
!Boost | !Boost | ||
!DRS | !DRS | ||
| + | !Weight | ||
|- | |- | ||
|no | |no | ||
|no | |no | ||
|no | |no | ||
| − | | | + | |830kg |
|- | |- | ||
!Onboard rollbars | !Onboard rollbars | ||
!Onboard brake bias | !Onboard brake bias | ||
!Pit limiter | !Pit limiter | ||
| − | ! | + | !Weight distribution |
|- | |- | ||
| + | |no | ||
|no | |no | ||
|yes | |yes | ||
| − | | | + | |40.0/60.0 |
| − | |||
|- | |- | ||
| − | |} | + | !Turbo |
| + | !Headlights | ||
| + | !Wheelbase | ||
| + | ! | ||
| + | |- | ||
| + | |no | ||
| + | |yes | ||
| + | |2.40m | ||
| + | | | ||
| + | |- | ||
| + | |} | ||
| − | = | + | =Copa Montana= |
{| class="wikitable" style="text-align:center; style="font-size:90%; width="65%" | {| class="wikitable" style="text-align:center; style="font-size:90%; width="65%" | ||
| − | |rowspan= | + | |rowspan=9 style="width:250px"|[[File:250montana.png|link=]] |
|- | |- | ||
| + | !Displacement | ||
!Power | !Power | ||
| − | |||
!Torque | !Torque | ||
!Transmission | !Transmission | ||
|- | |- | ||
| − | | | + | |5.70l |
| − | | | + | |369hp |
| − | | | + | |499Nm |
| − | |5 speed | + | |5 speed Seqiential |
|- | |- | ||
!Electronics | !Electronics | ||
| − | |||
!Boost | !Boost | ||
!DRS | !DRS | ||
| + | !Weight | ||
|- | |- | ||
|no | |no | ||
| + | |with rules | ||
|no | |no | ||
| − | | | + | |1360kg |
| − | |||
|- | |- | ||
!Onboard rollbars | !Onboard rollbars | ||
!Onboard brake bias | !Onboard brake bias | ||
!Pit limiter | !Pit limiter | ||
| − | ! | + | !Weight distribution |
|- | |- | ||
| − | |||
|yes | |yes | ||
| + | |yes | ||
| + | |yes | ||
| + | |50.6/49.4 | ||
| + | |- | ||
| + | !Turbo | ||
| + | !Headlights | ||
| + | !Wheelbase | ||
| + | ! | ||
| + | |- | ||
|no | |no | ||
|no | |no | ||
| + | |2.66m | ||
| + | | | ||
|- | |- | ||
|} | |} | ||
| − | === | + | =Copa Trucks= |
| + | ==Iveco Stralis== | ||
{| class="wikitable" style="text-align:center; style="font-size:90%; width="65%" | {| class="wikitable" style="text-align:center; style="font-size:90%; width="65%" | ||
| − | |rowspan= | + | |rowspan=9 style="width:250px"|[[File:ct_iveco_51.png|link=]] |
|- | |- | ||
| + | !Displacement | ||
!Power | !Power | ||
| − | |||
!Torque | !Torque | ||
!Transmission | !Transmission | ||
|- | |- | ||
| − | | | + | |12.90l |
| − | | | + | |1230hp |
| − | | | + | |3700Nm |
| − | |5 speed | + | |5 speed Seqiential |
|- | |- | ||
!Electronics | !Electronics | ||
| − | |||
!Boost | !Boost | ||
!DRS | !DRS | ||
| + | !Weight | ||
|- | |- | ||
|no | |no | ||
|no | |no | ||
|no | |no | ||
| − | | | + | |4800kg |
|- | |- | ||
!Onboard rollbars | !Onboard rollbars | ||
!Onboard brake bias | !Onboard brake bias | ||
!Pit limiter | !Pit limiter | ||
| − | ! | + | !Weight distribution |
|- | |- | ||
| + | |no | ||
|no | |no | ||
|yes | |yes | ||
| − | | | + | |56.2/43.8 |
| − | |||
|- | |- | ||
| − | |} | + | !Turbo |
| + | !Headlights | ||
| + | !Wheelbase | ||
| + | ! | ||
| + | |- | ||
| + | |yes | ||
| + | |no | ||
| + | |3.30m | ||
| + | | | ||
| + | |- | ||
| + | |} | ||
| − | == | + | ==MAN TGX== |
{| class="wikitable" style="text-align:center; style="font-size:90%; width="65%" | {| class="wikitable" style="text-align:center; style="font-size:90%; width="65%" | ||
| − | |rowspan= | + | |rowspan=9 style="width:250px"|[[File:ct_man_51.png|link=]] |
|- | |- | ||
| + | !Displacement | ||
!Power | !Power | ||
| − | |||
!Torque | !Torque | ||
!Transmission | !Transmission | ||
|- | |- | ||
| − | | | + | |12.40l |
| − | | | + | |1210hp |
| − | | | + | |3700Nm |
| − | |5 speed | + | |5 speed Seqiential |
|- | |- | ||
!Electronics | !Electronics | ||
| − | |||
!Boost | !Boost | ||
!DRS | !DRS | ||
| + | !Weight | ||
|- | |- | ||
|no | |no | ||
|no | |no | ||
|no | |no | ||
| − | | | + | |4820kg |
|- | |- | ||
!Onboard rollbars | !Onboard rollbars | ||
!Onboard brake bias | !Onboard brake bias | ||
!Pit limiter | !Pit limiter | ||
| − | ! | + | !Weight distribution |
|- | |- | ||
| + | |no | ||
|no | |no | ||
|yes | |yes | ||
| − | | | + | |55.8/44.2 |
| − | |||
|- | |- | ||
| − | |} | + | !Turbo |
| − | + | !Headlights | |
| − | == | + | !Wheelbase |
| + | ! | ||
| + | |- | ||
| + | |yes | ||
| + | |no | ||
| + | |3.35m | ||
| + | | | ||
| + | |- | ||
| + | |} | ||
| + | |||
| + | ==Mercedes-Benz Actros== | ||
{| class="wikitable" style="text-align:center; style="font-size:90%; width="65%" | {| class="wikitable" style="text-align:center; style="font-size:90%; width="65%" | ||
| − | |rowspan= | + | |rowspan=9 style="width:250px"|[[File:ct_merc_30.png|link=]] |
|- | |- | ||
| + | !Displacement | ||
!Power | !Power | ||
| − | |||
!Torque | !Torque | ||
!Transmission | !Transmission | ||
|- | |- | ||
| − | | | + | |12.80l |
| − | | | + | |1290hp |
| − | | | + | |3850Nm |
| − | |5 speed | + | |5 speed Seqiential |
|- | |- | ||
!Electronics | !Electronics | ||
| − | |||
!Boost | !Boost | ||
!DRS | !DRS | ||
| + | !Weight | ||
|- | |- | ||
|no | |no | ||
|no | |no | ||
|no | |no | ||
| − | | | + | |4950kg |
|- | |- | ||
!Onboard rollbars | !Onboard rollbars | ||
!Onboard brake bias | !Onboard brake bias | ||
!Pit limiter | !Pit limiter | ||
| − | ! | + | !Weight distribution |
|- | |- | ||
| + | |no | ||
|no | |no | ||
|yes | |yes | ||
| − | | | + | |53.8/46.2 |
| − | |||
|- | |- | ||
| − | | | + | !Turbo |
| − | + | !Headlights | |
| − | + | !Wheelbase | |
| + | ! | ||
| + | |- | ||
| + | |yes | ||
| + | |no | ||
| + | |3.30m | ||
| + | | | ||
| + | |- | ||
| + | |} | ||
| − | == | + | ==Vulkan Truck== |
{| class="wikitable" style="text-align:center; style="font-size:90%; width="65%" | {| class="wikitable" style="text-align:center; style="font-size:90%; width="65%" | ||
| − | |rowspan= | + | |rowspan=9 style="width:250px"|[[File:Ct_vv_51.png|link=]] |
|- | |- | ||
| + | !Displacement | ||
!Power | !Power | ||
| − | ! | + | !Torque |
| − | |||
!Transmission | !Transmission | ||
|- | |- | ||
| − | | | + | |12.00l |
| − | | | + | |1200hp |
| − | | | + | |3650Nm |
| − | | | + | |5 speed Seqiential |
|- | |- | ||
!Electronics | !Electronics | ||
| − | + | !Boost | |
| − | !Boost | ||
!DRS | !DRS | ||
| + | !Weight | ||
|- | |- | ||
|no | |no | ||
|no | |no | ||
|no | |no | ||
| − | | | + | |4900kg |
|- | |- | ||
| − | !Onboard | + | !Onboard rollbars |
!Onboard brake bias | !Onboard brake bias | ||
!Pit limiter | !Pit limiter | ||
| − | ! | + | !Weight distribution |
|- | |- | ||
| − | | | + | |no |
| − | | | + | |no |
| − | | | + | |yes |
| − | | | + | |55.8/44.2 |
| + | |- | ||
| + | !Turbo | ||
| + | !Headlights | ||
| + | !Wheelbase | ||
| + | ! | ||
| + | |- | ||
| + | |yes | ||
| + | |no | ||
| + | |3.35m | ||
| + | | | ||
|- | |- | ||
|} | |} | ||
| − | == | + | ==Volkswagen Constellation== |
{| class="wikitable" style="text-align:center; style="font-size:90%; width="65%" | {| class="wikitable" style="text-align:center; style="font-size:90%; width="65%" | ||
| − | |rowspan= | + | |rowspan=9 style="width:250px"|[[File:ct_vw_51.png|link=]] |
|- | |- | ||
| + | !Displacement | ||
!Power | !Power | ||
| − | ! | + | !Torque |
| − | |||
!Transmission | !Transmission | ||
|- | |- | ||
| − | | | + | |9.40l |
| − | | | + | |1150hp |
| − | | | + | |3500Nm |
| − | | | + | |5 speed Seqiential |
|- | |- | ||
!Electronics | !Electronics | ||
| − | + | !Boost | |
| − | !Boost | ||
!DRS | !DRS | ||
| + | !Weight | ||
|- | |- | ||
|no | |no | ||
|no | |no | ||
|no | |no | ||
| − | | | + | |4820kg |
|- | |- | ||
| − | !Onboard | + | !Onboard rollbars |
!Onboard brake bias | !Onboard brake bias | ||
!Pit limiter | !Pit limiter | ||
| + | !Weight distribution | ||
| + | |- | ||
| + | |no | ||
| + | |no | ||
| + | |yes | ||
| + | |55.8/44.2 | ||
| + | |- | ||
| + | !Turbo | ||
!Headlights | !Headlights | ||
| + | !Wheelbase | ||
| + | ! | ||
|- | |- | ||
| − | + | |yes | |
| − | | | + | |no |
| − | | | + | |3.35m |
| − | | | + | | |
|- | |- | ||
|} | |} | ||
| − | == | + | =Lancer RS= |
| + | ==Mitsubishi Lancer RS== | ||
{| class="wikitable" style="text-align:center; style="font-size:90%; width="65%" | {| class="wikitable" style="text-align:center; style="font-size:90%; width="65%" | ||
| − | |rowspan=7 style="width:250px"|[[File: | + | |rowspan=7 style="width:250px"|[[File:250rslancer.jpg|link=]] |
|- | |- | ||
!Power | !Power | ||
!Weight | !Weight | ||
| − | ! | + | !Torque |
!Transmission | !Transmission | ||
|- | |- | ||
| − | | | + | |330hp |
| − | | | + | |1490kg |
| − | | | + | |320Nm |
|6 Sequental | |6 Sequental | ||
|- | |- | ||
!Electronics | !Electronics | ||
!Turbo | !Turbo | ||
| − | !Boost | + | !Boost |
!DRS | !DRS | ||
|- | |- | ||
| − | | | + | |bgcolor="#ccffcc"|ABS TC |
|bgcolor="#ccffcc"|yes | |bgcolor="#ccffcc"|yes | ||
|no | |no | ||
| Строка 682: | Строка 776: | ||
!Headlights | !Headlights | ||
|- | |- | ||
| − | | | + | |no |
| − | | | + | |no |
| − | | | + | |no |
| − | | | + | |no |
|- | |- | ||
|} | |} | ||
| − | = | + | =Mini JCW UK= |
| − | |||
| − | |||
{| class="wikitable" style="text-align:center; style="font-size:90%; width="65%" | {| class="wikitable" style="text-align:center; style="font-size:90%; width="65%" | ||
| − | |rowspan= | + | |rowspan=9 style="width:250px"|[[File:Mini cooper.png|link=]] |
|- | |- | ||
| + | !Displacement | ||
!Power | !Power | ||
| − | |||
!Torque | !Torque | ||
!Transmission | !Transmission | ||
|- | |- | ||
| − | | | + | |2.00l |
| − | | | + | |278hp |
| − | | | + | |351Nm |
| − | |6 speed | + | |6 speed Seqiential |
|- | |- | ||
!Electronics | !Electronics | ||
| − | |||
!Boost | !Boost | ||
!DRS | !DRS | ||
| + | !Weight | ||
|- | |- | ||
| − | |ABS | + | |ABS |
| − | |||
|no | |no | ||
|no | |no | ||
| + | |1160kg | ||
|- | |- | ||
!Onboard rollbars | !Onboard rollbars | ||
!Onboard brake bias | !Onboard brake bias | ||
!Pit limiter | !Pit limiter | ||
| − | ! | + | !Weight distribution |
|- | |- | ||
| + | |yes | ||
|no | |no | ||
|yes | |yes | ||
| − | | | + | |61/39 |
| − | |||
|- | |- | ||
| − | |} | + | !Turbo |
| + | !Headlights | ||
| + | !Wheelbase | ||
| + | ! | ||
| + | |- | ||
| + | |yes | ||
| + | |no | ||
| + | |2.49m | ||
| + | | | ||
| + | |- | ||
| + | |} | ||
| − | = | + | =Chevrolet Opala Old Stock Race= |
{| class="wikitable" style="text-align:center; style="font-size:90%; width="65%" | {| class="wikitable" style="text-align:center; style="font-size:90%; width="65%" | ||
| − | |rowspan= | + | |rowspan=9 style="width:250px"|[[File:Opala_oldstock.png|link=]] |
|- | |- | ||
| + | !Displacement | ||
!Power | !Power | ||
| − | |||
!Torque | !Torque | ||
!Transmission | !Transmission | ||
|- | |- | ||
| − | | | + | |4.10l |
| − | | | + | |293hp |
| − | | | + | |415Nm |
| − | | | + | |5 speed H-Pattern |
|- | |- | ||
!Electronics | !Electronics | ||
| − | |||
!Boost | !Boost | ||
!DRS | !DRS | ||
| + | !Weight | ||
|- | |- | ||
| − | |||
|no | |no | ||
|no | |no | ||
|no | |no | ||
| + | |1100kg | ||
|- | |- | ||
!Onboard rollbars | !Onboard rollbars | ||
!Onboard brake bias | !Onboard brake bias | ||
!Pit limiter | !Pit limiter | ||
| − | ! | + | !Weight distribution |
|- | |- | ||
| + | |no | ||
|no | |no | ||
|yes | |yes | ||
| − | | | + | |55/45 |
| − | |||
|- | |- | ||
| − | |} | + | !Turbo |
| − | + | !Headlights | |
| − | = | + | !Wheelbase |
| + | ! | ||
| + | |- | ||
| + | |no | ||
| + | |no | ||
| + | |2.67m | ||
| + | | | ||
| + | |- | ||
| + | |} | ||
| + | |||
| + | =Formula Junior= | ||
{| class="wikitable" style="text-align:center; style="font-size:90%; width="65%" | {| class="wikitable" style="text-align:center; style="font-size:90%; width="65%" | ||
| − | |rowspan= | + | |rowspan=9 style="width:250px"|[[File:250formulajunior.png|link=]] |
|- | |- | ||
| + | !Displacement | ||
!Power | !Power | ||
| − | |||
!Torque | !Torque | ||
!Transmission | !Transmission | ||
|- | |- | ||
| − | | | + | |1.0l |
| − | | | + | |126hp |
| − | | | + | |116Nm |
| − | | | + | |4 speed H-Pattern |
|- | |- | ||
!Electronics | !Electronics | ||
| − | |||
!Boost | !Boost | ||
!DRS | !DRS | ||
| + | !Weight | ||
|- | |- | ||
| − | |||
|no | |no | ||
|no | |no | ||
|no | |no | ||
| + | |483kg | ||
|- | |- | ||
!Onboard rollbars | !Onboard rollbars | ||
!Onboard brake bias | !Onboard brake bias | ||
!Pit limiter | !Pit limiter | ||
| − | ! | + | !Weight distribution |
|- | |- | ||
| + | |no | ||
|no | |no | ||
|yes | |yes | ||
| − | | | + | |44.0/56.0 |
| − | | | + | |- |
| + | !Turbo | ||
| + | !Headlights | ||
| + | !Wheelbase | ||
| + | ! | ||
| + | |- | ||
| + | |no | ||
| + | |no | ||
| + | |2.31m | ||
| + | | | ||
|- | |- | ||
|} | |} | ||
| − | == | + | =Formula Vintage= |
| + | |||
| + | ==Gen Model 1== | ||
{| class="wikitable" style="text-align:center; style="font-size:90%; width="65%" | {| class="wikitable" style="text-align:center; style="font-size:90%; width="65%" | ||
| − | |rowspan=7 style="width:250px"|[[File: | + | |rowspan=7 style="width:250px"|[[File:67mac21.jpg|link=]] |
|- | |- | ||
!Power | !Power | ||
| Строка 808: | Строка 932: | ||
!Transmission | !Transmission | ||
|- | |- | ||
| − | | | + | |420hp |
| − | | | + | |595kg |
| − | | | + | |240Nm |
| − | | | + | |5 speed |
|- | |- | ||
!Electronics | !Electronics | ||
| Строка 818: | Строка 942: | ||
!DRS | !DRS | ||
|- | |- | ||
| − | | | + | |no |
| − | | | + | |no |
|no | |no | ||
|no | |no | ||
| Строка 826: | Строка 950: | ||
!Onboard brake bias | !Onboard brake bias | ||
!Pit limiter | !Pit limiter | ||
| − | ! | + | !Headlights |
|- | |- | ||
| + | |no | ||
|no | |no | ||
|yes | |yes | ||
| − | | | + | |no |
| − | |||
|- | |- | ||
|} | |} | ||
| − | = | + | ==Gen Model 2== |
| − | |||
| − | |||
{| class="wikitable" style="text-align:center; style="font-size:90%; width="65%" | {| class="wikitable" style="text-align:center; style="font-size:90%; width="65%" | ||
| − | |rowspan=7 style="width:250px"|[[File: | + | |rowspan=7 style="width:250px"|[[File:67fer21.jpg|link=]] |
|- | |- | ||
!Power | !Power | ||
| Строка 846: | Строка 968: | ||
!Transmission | !Transmission | ||
|- | |- | ||
| − | | | + | |450hp |
| − | | | + | |630kg |
| − | | | + | |245Nm |
| − | |5 speed | + | |5 speed |
|- | |- | ||
!Electronics | !Electronics | ||
| Строка 864: | Строка 986: | ||
!Onboard brake bias | !Onboard brake bias | ||
!Pit limiter | !Pit limiter | ||
| − | ! | + | !Headlights |
|- | |- | ||
| + | |no | ||
|no | |no | ||
|yes | |yes | ||
| − | | | + | |no |
| − | |||
|- | |- | ||
|} | |} | ||
| − | = | + | =German Group A= |
| − | == | + | ==Mercedes-Benz 190E 2.5-16 Evo II DTM== |
{| class="wikitable" style="text-align:center; style="font-size:90%; width="65%" | {| class="wikitable" style="text-align:center; style="font-size:90%; width="65%" | ||
| − | |rowspan= | + | |rowspan=9 style="width:250px"|[[File:250mercedes_190E.png|link=]] |
|- | |- | ||
| + | !Displacement | ||
!Power | !Power | ||
| − | |||
!Torque | !Torque | ||
!Transmission | !Transmission | ||
|- | |- | ||
| − | | | + | |2.50l |
| − | | | + | |340hp |
| − | | | + | |303Nm |
| − | | | + | |5 speed H-Pattern |
|- | |- | ||
!Electronics | !Electronics | ||
| − | |||
!Boost | !Boost | ||
!DRS | !DRS | ||
| + | !Weight | ||
|- | |- | ||
| + | |ABS | ||
|no | |no | ||
|no | |no | ||
| − | | | + | |1070kg |
| − | |||
|- | |- | ||
!Onboard rollbars | !Onboard rollbars | ||
!Onboard brake bias | !Onboard brake bias | ||
!Pit limiter | !Pit limiter | ||
| − | ! | + | !Weight distribution |
|- | |- | ||
| − | |||
| − | |||
|yes | |yes | ||
|yes | |yes | ||
| + | |yes | ||
| + | |51.6/48.4 | ||
|- | |- | ||
| − | + | !Turbo | |
| − | + | !Headlights | |
| − | + | !Wheelbase | |
| − | + | ! | |
| − | |||
| − | |||
|- | |- | ||
| + | |no | ||
| + | |yes | ||
| + | |2.66m | ||
| + | | | ||
| + | |- | ||
| + | |} | ||
| + | |||
| + | ==BMW M3 Sport Evo Group A== | ||
| + | {| class="wikitable" style="text-align:center; style="font-size:90%; width="65%" | ||
| + | |rowspan=9 style="width:250px"|[[File:250bmw_m3_e30.png|link=]] | ||
| + | |- | ||
| + | !Displacement | ||
!Power | !Power | ||
| − | |||
!Torque | !Torque | ||
!Transmission | !Transmission | ||
|- | |- | ||
| − | | | + | |2.50l |
| − | | | + | |328hp |
| − | | | + | |300Nm |
|5 speed H-Pattern | |5 speed H-Pattern | ||
|- | |- | ||
!Electronics | !Electronics | ||
| − | |||
!Boost | !Boost | ||
!DRS | !DRS | ||
| + | !Weight | ||
|- | |- | ||
| + | |ABS | ||
|no | |no | ||
|no | |no | ||
| − | | | + | |1040kg |
| − | |||
|- | |- | ||
!Onboard rollbars | !Onboard rollbars | ||
!Onboard brake bias | !Onboard brake bias | ||
!Pit limiter | !Pit limiter | ||
| − | ! | + | !Weight distribution |
|- | |- | ||
| − | |||
|yes | |yes | ||
|yes | |yes | ||
|yes | |yes | ||
| + | |51.4/48.6 | ||
| + | |- | ||
| + | !Turbo | ||
| + | !Headlights | ||
| + | !Wheelbase | ||
| + | ! | ||
| + | |- | ||
| + | |no | ||
| + | |yes | ||
| + | |2.57m | ||
| + | | | ||
|- | |- | ||
|} | |} | ||
| − | == | + | =Formula Vee= |
| + | |||
| + | ==Formula Vee== | ||
{| class="wikitable" style="text-align:center; style="font-size:90%; width="65%" | {| class="wikitable" style="text-align:center; style="font-size:90%; width="65%" | ||
| − | |rowspan= | + | |rowspan=9 style="width:250px"|[[File:250vee.png|link=]] |
|- | |- | ||
| + | !Displacement | ||
!Power | !Power | ||
| − | |||
!Torque | !Torque | ||
!Transmission | !Transmission | ||
|- | |- | ||
| − | | | + | |1.60l |
| − | | | + | |93hp |
| − | | | + | |159Nm |
|4 speed H-Pattern | |4 speed H-Pattern | ||
|- | |- | ||
!Electronics | !Electronics | ||
| − | |||
!Boost | !Boost | ||
!DRS | !DRS | ||
| + | !Weight | ||
|- | |- | ||
|no | |no | ||
|no | |no | ||
|no | |no | ||
| − | | | + | |530kg |
|- | |- | ||
!Onboard rollbars | !Onboard rollbars | ||
!Onboard brake bias | !Onboard brake bias | ||
!Pit limiter | !Pit limiter | ||
| − | ! | + | !Weight distribution |
|- | |- | ||
|no | |no | ||
|no | |no | ||
|yes | |yes | ||
| + | |0.47/0.53 | ||
| + | |- | ||
| + | !Turbo | ||
| + | !Headlights | ||
| + | !Wheelbase | ||
| + | ! | ||
| + | |- | ||
| + | |no | ||
| + | |no | ||
| + | |2.27m | ||
| + | | | ||
| + | |- | ||
| + | |} | ||
| + | |||
| + | ==Formula Vee Fin== | ||
| + | {| class="wikitable" style="text-align:center; style="font-size:90%; width="65%" | ||
| + | |rowspan=9 style="width:250px"|[[File:250veefin.png|link=]] | ||
| + | |- | ||
| + | !Displacement | ||
| + | !Power | ||
| + | !Torque | ||
| + | !Transmission | ||
| + | |- | ||
| + | |1.60l | ||
| + | |93hp | ||
| + | |159Nm | ||
| + | |4 speed H-Pattern | ||
| + | |- | ||
| + | !Electronics | ||
| + | !Boost | ||
| + | !DRS | ||
| + | !Weight | ||
| + | |- | ||
| + | |no | ||
| + | |no | ||
| + | |no | ||
| + | |530kg | ||
| + | |- | ||
| + | !Onboard rollbars | ||
| + | !Onboard brake bias | ||
| + | !Pit limiter | ||
| + | !Weight distribution | ||
| + | |- | ||
| + | |no | ||
| + | |no | ||
|yes | |yes | ||
| + | |0.47/0.53 | ||
| + | |- | ||
| + | !Turbo | ||
| + | !Headlights | ||
| + | !Wheelbase | ||
| + | ! | ||
| + | |- | ||
| + | |no | ||
| + | |no | ||
| + | |2.27m | ||
| + | | | ||
| + | |- | ||
| + | |} | ||
| + | |||
| + | =Formula Retro= | ||
| + | ==Gen 1== | ||
| + | ===Brabham BT44=== | ||
| + | {| class="wikitable" style="text-align:center; style="font-size:90%; width="65%" | ||
| + | |rowspan=7 style="width:250px"|[[File:75brab.png|link=]] | ||
| + | |- | ||
| + | !Power | ||
| + | !Weight | ||
| + | !Torque | ||
| + | !Transmission | ||
| + | |- | ||
| + | |475hp | ||
| + | |650kg | ||
| + | |265Nm | ||
| + | |5 speed H-Pattern | ||
| + | |- | ||
| + | !Electronics | ||
| + | !Turbo | ||
| + | !Boost | ||
| + | !DRS | ||
| + | |- | ||
| + | |no | ||
| + | |no | ||
| + | |no | ||
| + | |no | ||
| + | |- | ||
| + | !Onboard rollbars | ||
| + | !Onboard brake bias | ||
| + | !Pit limiter | ||
| + | !Headlights | ||
| + | |- | ||
| + | |no | ||
| + | |yes | ||
| + | |no | ||
| + | |no | ||
| + | |- | ||
| + | |} | ||
| + | |||
| + | ===Formula Retro V12=== | ||
| + | {| class="wikitable" style="text-align:center; style="font-size:90%; width="65%" | ||
| + | |rowspan=7 style="width:250px"|[[File:75retv12.png|link=]] | ||
| + | |- | ||
| + | !Power | ||
| + | !Weight | ||
| + | !Torque | ||
| + | !Transmission | ||
| + | |- | ||
| + | |490hp | ||
| + | |670kg | ||
| + | |305Nm | ||
| + | |5 speed H-Pattern | ||
| + | |- | ||
| + | !Electronics | ||
| + | !Turbo | ||
| + | !Boost | ||
| + | !DRS | ||
| + | |- | ||
| + | |no | ||
| + | |no | ||
| + | |no | ||
| + | |no | ||
| + | |- | ||
| + | !Onboard rollbars | ||
| + | !Onboard brake bias | ||
| + | !Pit limiter | ||
| + | !Headlights | ||
| + | |- | ||
| + | |no | ||
| + | |yes | ||
| + | |no | ||
| + | |no | ||
| + | |- | ||
| + | |} | ||
| + | |||
| + | ===Formula Retro V8=== | ||
| + | {| class="wikitable" style="text-align:center; style="font-size:90%; width="65%" | ||
| + | |rowspan=7 style="width:250px"|[[File:75retv8.png|link=]] | ||
| + | |- | ||
| + | !Power | ||
| + | !Weight | ||
| + | !Torque | ||
| + | !Transmission | ||
| + | |- | ||
| + | |474hp | ||
| + | |575kg | ||
| + | |261Nm | ||
| + | |5 speed H-Pattern | ||
| + | |- | ||
| + | !Electronics | ||
| + | !Turbo | ||
| + | !Boost | ||
| + | !DRS | ||
| + | |- | ||
| + | |no | ||
| + | |no | ||
| + | |no | ||
| + | |no | ||
| + | |- | ||
| + | !Onboard rollbars | ||
| + | !Onboard brake bias | ||
| + | !Pit limiter | ||
| + | !Headlights | ||
| + | |- | ||
| + | |no | ||
| + | |yes | ||
| + | |no | ||
| + | |no | ||
| + | |- | ||
| + | |} | ||
| + | |||
| + | ===Lotus Type 72E=== | ||
| + | {| class="wikitable" style="text-align:center; style="font-size:90%; width="65%" | ||
| + | |rowspan=7 style="width:250px"|[[File:75lot.png|link=]] | ||
| + | |- | ||
| + | !Power | ||
| + | !Weight | ||
| + | !Torque | ||
| + | !Transmission | ||
| + | |- | ||
| + | |480hp | ||
| + | |640kg | ||
| + | |265Nm | ||
| + | |5 speed H-Pattern | ||
| + | |- | ||
| + | !Electronics | ||
| + | !Turbo | ||
| + | !Boost | ||
| + | !DRS | ||
| + | |- | ||
| + | |no | ||
| + | |no | ||
| + | |no | ||
| + | |no | ||
| + | |- | ||
| + | !Onboard rollbars | ||
| + | !Onboard brake bias | ||
| + | !Pit limiter | ||
| + | !Headlights | ||
| + | |- | ||
| + | |no | ||
| + | |yes | ||
| + | |no | ||
| + | |no | ||
| + | |- | ||
| + | |} | ||
| + | |||
| + | ===McLaren M23=== | ||
| + | {| class="wikitable" style="text-align:center; style="font-size:90%; width="65%" | ||
| + | |rowspan=7 style="width:250px"|[[File:75mc.png|link=]] | ||
| + | |- | ||
| + | !Power | ||
| + | !Weight | ||
| + | !Torque | ||
| + | !Transmission | ||
| + | |- | ||
| + | |475hp | ||
| + | |655kg | ||
| + | |265Nm | ||
| + | |5 speed H-Pattern | ||
| + | |- | ||
| + | !Electronics | ||
| + | !Turbo | ||
| + | !Boost | ||
| + | !DRS | ||
| + | |- | ||
| + | |no | ||
| + | |no | ||
| + | |no | ||
| + | |no | ||
| + | |- | ||
| + | !Onboard rollbars | ||
| + | !Onboard brake bias | ||
| + | !Pit limiter | ||
| + | !Headlights | ||
| + | |- | ||
| + | |no | ||
| + | |yes | ||
| + | |no | ||
| + | |no | ||
| + | |- | ||
| + | |} | ||
| + | |||
| + | =Formula Trainer= | ||
| + | ==Formula Trainer== | ||
| + | {| class="wikitable" style="text-align:center; style="font-size:90%; width="65%" | ||
| + | |rowspan=9 style="width:250px"|[[File:250formula_trainer.png|link=]] | ||
| + | |- | ||
| + | !Displacement | ||
| + | !Power | ||
| + | !Torque | ||
| + | !Transmission | ||
| + | |- | ||
| + | |1.60l | ||
| + | |113hp | ||
| + | |158Nm | ||
| + | |4 speed Sequential | ||
| + | |- | ||
| + | !Electronics | ||
| + | !Boost | ||
| + | !DRS | ||
| + | !Weight | ||
| + | |- | ||
| + | |no | ||
| + | |no | ||
| + | |no | ||
| + | |495kg | ||
| + | |- | ||
| + | !Onboard rollbars | ||
| + | !Onboard brake bias | ||
| + | !Pit limiter | ||
| + | !Weight distribution | ||
| + | |- | ||
| + | |no | ||
| + | |no | ||
| + | |yes | ||
| + | |0.45/0.55 | ||
| + | |- | ||
| + | !Turbo | ||
| + | !Headlights | ||
| + | !Wheelbase | ||
| + | ! | ||
| + | |- | ||
| + | |no | ||
| + | |no | ||
| + | |2.53m | ||
| + | | | ||
| + | |- | ||
| + | |} | ||
| + | |||
| + | ==Formula Trainer Advanced== | ||
| + | {| class="wikitable" style="text-align:center; style="font-size:90%; width="65%" | ||
| + | |rowspan=9 style="width:250px"|[[File:250formula_trainer.png|link=]] | ||
| + | |- | ||
| + | !Displacement | ||
| + | !Power | ||
| + | !Torque | ||
| + | !Transmission | ||
| + | |- | ||
| + | |1.60l | ||
| + | |155hp | ||
| + | |180Nm | ||
| + | |4 speed Sequential | ||
| + | |- | ||
| + | !Electronics | ||
| + | !Boost | ||
| + | !DRS | ||
| + | !Weight | ||
| + | |- | ||
| + | |no | ||
| + | |no | ||
| + | |no | ||
| + | |495kg | ||
| + | |- | ||
| + | !Onboard rollbars | ||
| + | !Onboard brake bias | ||
| + | !Pit limiter | ||
| + | !Weight distribution | ||
| + | |- | ||
| + | |no | ||
| + | |no | ||
| + | |yes | ||
| + | |0.45/0.55 | ||
| + | |- | ||
| + | !Turbo | ||
| + | !Headlights | ||
| + | !Wheelbase | ||
| + | ! | ||
| + | |- | ||
| + | |no | ||
| + | |no | ||
| + | |2.53m | ||
| + | | | ||
| + | |- | ||
| + | |} | ||
| + | |||
| + | =GT1= | ||
| + | |||
| + | ==McLaren F1 GTR== | ||
| + | {| class="wikitable" style="text-align:center; style="font-size:90%; width="65%" | ||
| + | |rowspan=7 style="width:250px"|[[File:Mac98.jpg|link=]] | ||
| + | |- | ||
| + | !Power | ||
| + | !Weight | ||
| + | !Torgue | ||
| + | !Transmission | ||
| + | |- | ||
| + | |600hp | ||
| + | |1042kg | ||
| + | |500Nm | ||
| + | |6 Sequental | ||
| + | |- | ||
| + | !Electronics | ||
| + | !Turbo | ||
| + | !Boost button | ||
| + | !DRS | ||
| + | |- | ||
| + | |no | ||
| + | |no | ||
| + | |no | ||
| + | |no | ||
| + | |- | ||
| + | !Onboard roll bars | ||
| + | !Onboard brake bias | ||
| + | !Pit limiter | ||
| + | !Headlights | ||
| + | |- | ||
| + | |bgcolor="#ccffcc"|yes | ||
| + | |bgcolor="#ccffcc"|yes | ||
| + | |bgcolor="#ccffcc"|yes | ||
| + | |bgcolor="#ccffcc"|yes | ||
| + | |- | ||
| + | |} | ||
| + | |||
| + | ==Mercedes-Benz CLK LM== | ||
| + | {| class="wikitable" style="text-align:center; style="font-size:90%; width="65%" | ||
| + | |rowspan=7 style="width:250px"|[[File:Merc98.jpg|link=]] | ||
| + | |- | ||
| + | !Power | ||
| + | !Weight | ||
| + | !Torgue | ||
| + | !Transmission | ||
| + | |- | ||
| + | |600hp | ||
| + | |1059kg | ||
| + | |489Nm | ||
| + | |6 Sequental | ||
| + | |- | ||
| + | !Electronics | ||
| + | !Turbo | ||
| + | !Boost button | ||
| + | !DRS | ||
| + | |- | ||
| + | |no | ||
| + | |no | ||
| + | |no | ||
| + | |no | ||
| + | |- | ||
| + | !Onboard roll bars | ||
| + | !Onboard brake bias | ||
| + | !Pit limiter | ||
| + | !Headlights | ||
| + | |- | ||
| + | |bgcolor="#ccffcc"|yes | ||
| + | |bgcolor="#ccffcc"|yes | ||
| + | |bgcolor="#ccffcc"|yes | ||
| + | |bgcolor="#ccffcc"|yes | ||
| + | |- | ||
| + | |} | ||
| + | |||
| + | ==Porsche 911 GT1-98== | ||
| + | {| class="wikitable" style="text-align:center; style="font-size:90%; width="65%" | ||
| + | |rowspan=7 style="width:250px"|[[File:por98.jpg|link=]] | ||
| + | |- | ||
| + | !Power | ||
| + | !Weight | ||
| + | !Torgue | ||
| + | !Transmission | ||
| + | |- | ||
| + | |580hp | ||
| + | |1052kg | ||
| + | |465Nm | ||
| + | |6 Sequental | ||
| + | |- | ||
| + | !Electronics | ||
| + | !Turbo | ||
| + | !Boost button | ||
| + | !DRS | ||
| + | |- | ||
| + | |no | ||
| + | |bgcolor="#ccffcc"|yes | ||
| + | |no | ||
| + | |no | ||
| + | |- | ||
| + | !Onboard roll bars | ||
| + | !Onboard brake bias | ||
| + | !Pit limiter | ||
| + | !Headlights | ||
| + | |- | ||
| + | |bgcolor="#ccffcc"|yes | ||
| + | |bgcolor="#ccffcc"|yes | ||
| + | |bgcolor="#ccffcc"|yes | ||
| + | |bgcolor="#ccffcc"|yes | ||
| + | |- | ||
| + | |} | ||
| + | |||
| + | =DPI= | ||
| + | ==Cadillac DPi-VR== | ||
| + | {| class="wikitable" style="text-align:center; style="font-size:90%; width="65%" | ||
| + | |rowspan=9 style="width:250px"|[[File:cad_dpi.png|link=]] | ||
| + | |- | ||
| + | !Displacement | ||
| + | !Power | ||
| + | !Torque | ||
| + | !Transmission | ||
| + | |- | ||
| + | |5.50l | ||
| + | |582hp | ||
| + | |620Nm | ||
| + | |6 speed Sequential | ||
| + | |- | ||
| + | !Electronics | ||
| + | !Boost | ||
| + | !DRS | ||
| + | !Weight | ||
| + | |- | ||
| + | |TC | ||
| + | |no | ||
| + | |no | ||
| + | |1015kg | ||
| + | |- | ||
| + | !Onboard rollbars | ||
| + | !Onboard brake bias | ||
| + | !Pit limiter | ||
| + | !Weight distribution | ||
| + | |- | ||
| + | |no | ||
| + | |yes | ||
| + | |yes | ||
| + | |45.4/54.6 | ||
| + | |- | ||
| + | !Turbo | ||
| + | !Headlights | ||
| + | !Wheelbase | ||
| + | ! | ||
| + | |- | ||
| + | |no | ||
| + | |yes | ||
| + | |2.96m | ||
| + | | | ||
| + | |- | ||
| + | |} | ||
| + | |||
| + | =GTE= | ||
| + | ==Chevrolet Corvette C8.R== | ||
| + | {| class="wikitable" style="text-align:center; style="font-size:90%; width="65%" | ||
| + | |rowspan=9 style="width:250px"|[[File:gte_c8r.png|link=]] | ||
| + | |- | ||
| + | !Displacement | ||
| + | !Power | ||
| + | !Torque | ||
| + | !Transmission | ||
| + | |- | ||
| + | |5.50l | ||
| + | |526hp | ||
| + | |637Nm | ||
| + | |6 speed Sequential | ||
| + | |- | ||
| + | !Electronics | ||
| + | !Boost | ||
| + | !DRS | ||
| + | !Weight | ||
| + | |- | ||
| + | |TC | ||
| + | |no | ||
| + | |no | ||
| + | |1328kg | ||
| + | |- | ||
| + | !Onboard rollbars | ||
| + | !Onboard brake bias | ||
| + | !Pit limiter | ||
| + | !Weight distribution | ||
| + | |- | ||
| + | |no | ||
| + | |yes | ||
| + | |yes | ||
| + | |44.2/55.8 | ||
| + | |- | ||
| + | !Turbo | ||
| + | !Headlights | ||
| + | !Wheelbase | ||
| + | ! | ||
| + | |- | ||
| + | |no | ||
| + | |yes | ||
| + | |2.72m | ||
| + | | | ||
| + | |- | ||
| + | |} | ||
| + | |||
| + | ==BMW M8 GTE== | ||
| + | {| class="wikitable" style="text-align:center; style="font-size:90%; width="65%" | ||
| + | |rowspan=9 style="width:250px"|[[File:gte_m8.png|link=]] | ||
| + | |- | ||
| + | !Displacement | ||
| + | !Power | ||
| + | !Torque | ||
| + | !Transmission | ||
| + | |- | ||
| + | |3.98l | ||
| + | |551hp | ||
| + | |758Nm | ||
| + | |6 speed Sequential | ||
| + | |- | ||
| + | !Electronics | ||
| + | !Boost | ||
| + | !DRS | ||
| + | !Weight | ||
| + | |- | ||
| + | |TC | ||
| + | |no | ||
| + | |no | ||
| + | |1320kg | ||
| + | |- | ||
| + | !Onboard rollbars | ||
| + | !Onboard brake bias | ||
| + | !Pit limiter | ||
| + | !Weight distribution | ||
| + | |- | ||
| + | |no | ||
| + | |yes | ||
| + | |yes | ||
| + | |51.0/49.0 | ||
| + | |- | ||
| + | !Turbo | ||
| + | !Headlights | ||
| + | !Wheelbase | ||
| + | ! | ||
| + | |- | ||
| + | |no | ||
| + | |yes | ||
| + | |2.86m | ||
| + | | | ||
| + | |- | ||
| + | |} | ||
| + | |||
| + | ==Porsche 911 RSR GTE== | ||
| + | {| class="wikitable" style="text-align:center; style="font-size:90%; width="65%" | ||
| + | |rowspan=9 style="width:250px"|[[File:Gte_911.png|link=]] | ||
| + | |- | ||
| + | !Displacement | ||
| + | !Power | ||
| + | !Torque | ||
| + | !Transmission | ||
| + | |- | ||
| + | |4.19l | ||
| + | |528hp | ||
| + | |485Nm | ||
| + | |6 speed Sequential | ||
| + | |- | ||
| + | !Electronics | ||
| + | !Boost | ||
| + | !DRS | ||
| + | !Weight | ||
| + | |- | ||
| + | |TC | ||
| + | |no | ||
| + | |no | ||
| + | |1328kg | ||
| + | |- | ||
| + | !Onboard rollbars | ||
| + | !Onboard brake bias | ||
| + | !Pit limiter | ||
| + | !Weight distribution | ||
| + | |- | ||
| + | |no | ||
| + | |yes | ||
| + | |yes | ||
| + | |43.8/56.2 | ||
| + | |- | ||
| + | !Turbo | ||
| + | !Headlights | ||
| + | !Wheelbase | ||
| + | ! | ||
| + | |- | ||
| + | |no | ||
| + | |yes | ||
| + | |2.51m | ||
| + | | | ||
| + | |- | ||
| + | |} | ||
| + | |||
| + | =GT3= | ||
| + | ==McLaren 720S GT3== | ||
| + | {| class="wikitable" style="text-align:center; style="font-size:90%; width="65%" | ||
| + | |rowspan=9 style="width:250px"|[[File:gt3_720s.png|link=]] | ||
| + | |- | ||
| + | !Displacement | ||
| + | !Power | ||
| + | !Torque | ||
| + | !Transmission | ||
| + | |- | ||
| + | |3.80l | ||
| + | |519hp | ||
| + | |626Nm | ||
| + | |6 speed Sequential | ||
| + | |- | ||
| + | !Electronics | ||
| + | !Boost | ||
| + | !DRS | ||
| + | !Weight | ||
| + | |- | ||
| + | |ABS TC | ||
| + | |no | ||
| + | |no | ||
| + | |1380kg | ||
| + | |- | ||
| + | !Onboard rollbars | ||
| + | !Onboard brake bias | ||
| + | !Pit limiter | ||
| + | !Weight distribution | ||
| + | |- | ||
| + | |no | ||
| + | |yes | ||
| + | |yes | ||
| + | |44.0/56.0 | ||
| + | |- | ||
| + | !Turbo | ||
| + | !Headlights | ||
| + | !Wheelbase | ||
| + | ! | ||
| + | |- | ||
| + | |yes | ||
| + | |yes | ||
| + | |2.70m | ||
| + | | | ||
| + | |- | ||
| + | |} | ||
| + | |||
| + | ==Porsche 911 GT3 R== | ||
| + | {| class="wikitable" style="text-align:center; style="font-size:90%; width="65%" | ||
| + | |rowspan=9 style="width:250px"|[[File:gt3_991.png|link=]] | ||
| + | |- | ||
| + | !Displacement | ||
| + | !Power | ||
| + | !Torque | ||
| + | !Transmission | ||
| + | |- | ||
| + | |4.00l | ||
| + | |512hp | ||
| + | |469Nm | ||
| + | |6 speed Sequential | ||
| + | |- | ||
| + | !Electronics | ||
| + | !Boost | ||
| + | !DRS | ||
| + | !Weight | ||
| + | |- | ||
| + | |ABS TC | ||
| + | |no | ||
| + | |no | ||
| + | |1328kg | ||
| + | |- | ||
| + | !Onboard rollbars | ||
| + | !Onboard brake bias | ||
| + | !Pit limiter | ||
| + | !Weight distribution | ||
| + | |- | ||
| + | |no | ||
| + | |yes | ||
| + | |yes | ||
| + | |42.2/57.8 | ||
| + | |- | ||
| + | !Turbo | ||
| + | !Headlights | ||
| + | !Wheelbase | ||
| + | ! | ||
| + | |- | ||
| + | |no | ||
| + | |yes | ||
| + | |2.46m | ||
| + | | | ||
| + | |- | ||
| + | |} | ||
| + | |||
| + | ==Mercedes AMG GT3== | ||
| + | {| class="wikitable" style="text-align:center; style="font-size:90%; width="65%" | ||
| + | |rowspan=9 style="width:250px"|[[File:gt3_amg.png|link=]] | ||
| + | |- | ||
| + | !Displacement | ||
| + | !Power | ||
| + | !Torque | ||
| + | !Transmission | ||
| + | |- | ||
| + | |6.21l | ||
| + | |521hp | ||
| + | |604Nm | ||
| + | |6 speed Sequential | ||
| + | |- | ||
| + | !Electronics | ||
| + | !Boost | ||
| + | !DRS | ||
| + | !Weight | ||
| + | |- | ||
| + | |ABS TC | ||
| + | |no | ||
| + | |no | ||
| + | |1370kg | ||
| + | |- | ||
| + | !Onboard rollbars | ||
| + | !Onboard brake bias | ||
| + | !Pit limiter | ||
| + | !Weight distribution | ||
| + | |- | ||
| + | |no | ||
| + | |yes | ||
| + | |yes | ||
| + | |44.0/56.0 | ||
| + | |- | ||
| + | !Turbo | ||
| + | !Headlights | ||
| + | !Wheelbase | ||
| + | ! | ||
| + | |- | ||
| + | |no | ||
| + | |yes | ||
| + | |2.64m | ||
| + | | | ||
| + | |- | ||
| + | |} | ||
| + | |||
| + | ==Nissan GT-R Nismo GT3== | ||
| + | {| class="wikitable" style="text-align:center; style="font-size:90%; width="65%" | ||
| + | |rowspan=9 style="width:250px"|[[File:gt3_nismo.png|link=]] | ||
| + | |- | ||
| + | !Displacement | ||
| + | !Power | ||
| + | !Torque | ||
| + | !Transmission | ||
| + | |- | ||
| + | |3.80l | ||
| + | |540hp | ||
| + | |659Nm | ||
| + | |6 speed Sequential | ||
| + | |- | ||
| + | !Electronics | ||
| + | !Boost | ||
| + | !DRS | ||
| + | !Weight | ||
| + | |- | ||
| + | |ABS TC | ||
| + | |no | ||
| + | |no | ||
| + | |1385kg | ||
| + | |- | ||
| + | !Onboard rollbars | ||
| + | !Onboard brake bias | ||
| + | !Pit limiter | ||
| + | !Weight distribution | ||
| + | |- | ||
| + | |no | ||
| + | |yes | ||
| + | |yes | ||
| + | |54.0/46.0 | ||
| + | |- | ||
| + | !Turbo | ||
| + | !Headlights | ||
| + | !Wheelbase | ||
| + | ! | ||
| + | |- | ||
| + | |yes | ||
| + | |yes | ||
| + | |2.77m | ||
| + | | | ||
| + | |- | ||
| + | |} | ||
| + | |||
| + | ==BMW M6 GT3== | ||
| + | {| class="wikitable" style="text-align:center; style="font-size:90%; width="65%" | ||
| + | |rowspan=9 style="width:250px"|[[File:gt3_m6.png|link=]] | ||
| + | |- | ||
| + | !Displacement | ||
| + | !Power | ||
| + | !Torque | ||
| + | !Transmission | ||
| + | |- | ||
| + | |4.39l | ||
| + | |520hp | ||
| + | |718Nm | ||
| + | |6 speed Sequential | ||
| + | |- | ||
| + | !Electronics | ||
| + | !Boost | ||
| + | !DRS | ||
| + | !Weight | ||
| + | |- | ||
| + | |ABS TC | ||
| + | |no | ||
| + | |no | ||
| + | |1400kg | ||
| + | |- | ||
| + | !Onboard rollbars | ||
| + | !Onboard brake bias | ||
| + | !Pit limiter | ||
| + | !Weight distribution | ||
| + | |- | ||
| + | |no | ||
| + | |yes | ||
| + | |yes | ||
| + | |52.0/48.0 | ||
| + | |- | ||
| + | !Turbo | ||
| + | !Headlights | ||
| + | !Wheelbase | ||
| + | ! | ||
| + | |- | ||
| + | |yes | ||
| + | |yes | ||
| + | |2.88m | ||
| + | | | ||
| + | |- | ||
| + | |} | ||
| + | |||
| + | =Hot Cars= | ||
| + | ==Fusca 1 Hot Cars== | ||
| + | {| class="wikitable" style="text-align:center; style="font-size:90%; width="65%" | ||
| + | |rowspan=9 style="width:250px"|[[File:250fusca1_hotcars.png|link=]] | ||
| + | |- | ||
| + | !Displacement | ||
| + | !Power | ||
| + | !Torque | ||
| + | !Transmission | ||
| + | |- | ||
| + | |1.60l | ||
| + | |160hp | ||
| + | |183Nm | ||
| + | |4 speed H-Pattern | ||
| + | |- | ||
| + | !Electronics | ||
| + | !Boost | ||
| + | !DRS | ||
| + | !Weight | ||
| + | |- | ||
| + | |no | ||
| + | |no | ||
| + | |no | ||
| + | |760kg | ||
| + | |- | ||
| + | !Onboard rollbars | ||
| + | !Onboard brake bias | ||
| + | !Pit limiter | ||
| + | !Weight distribution | ||
| + | |- | ||
| + | |no | ||
| + | |no | ||
| + | |yes | ||
| + | |38.2/61.8 | ||
| + | |- | ||
| + | !Turbo | ||
| + | !Headlights | ||
| + | !Wheelbase | ||
| + | !Drive/Engine | ||
| + | |- | ||
| + | |no | ||
| + | |no | ||
| + | |2.40m | ||
| + | |RWD/Rear | ||
| + | |- | ||
| + | |} | ||
| + | |||
| + | ==Fusca 2 Hot Cars== | ||
| + | {| class="wikitable" style="text-align:center; style="font-size:90%; width="65%" | ||
| + | |rowspan=9 style="width:250px"|[[File:250fusca2_hotcars.png|link=]] | ||
| + | |- | ||
| + | !Displacement | ||
| + | !Power | ||
| + | !Torque | ||
| + | !Transmission | ||
| + | |- | ||
| + | |1.60l | ||
| + | |160hp | ||
| + | |183Nm | ||
| + | |4 speed H-Pattern | ||
| + | |- | ||
| + | !Electronics | ||
| + | !Boost | ||
| + | !DRS | ||
| + | !Weight | ||
| + | |- | ||
| + | |no | ||
| + | |no | ||
| + | |no | ||
| + | |760kg | ||
| + | |- | ||
| + | !Onboard rollbars | ||
| + | !Onboard brake bias | ||
| + | !Pit limiter | ||
| + | !Weight distribution | ||
| + | |- | ||
| + | |no | ||
| + | |no | ||
| + | |yes | ||
| + | |38.0/62.0 | ||
| + | |- | ||
| + | !Turbo | ||
| + | !Headlights | ||
| + | !Wheelbase | ||
| + | ! | ||
| + | |- | ||
| + | |no | ||
| + | |no | ||
| + | |2.40m | ||
| + | | | ||
| + | |- | ||
| + | |} | ||
| + | |||
| + | ==Gol Hot Cars== | ||
| + | {| class="wikitable" style="text-align:center; style="font-size:90%; width="65%" | ||
| + | |rowspan=9 style="width:250px"|[[File:250gol_hotcars.png|link=]] | ||
| + | |- | ||
| + | !Displacement | ||
| + | !Power | ||
| + | !Torque | ||
| + | !Transmission | ||
| + | |- | ||
| + | |1.60l | ||
| + | |160hp | ||
| + | |183Nm | ||
| + | |4 speed H-Pattern | ||
| + | |- | ||
| + | !Electronics | ||
| + | !Boost | ||
| + | !DRS | ||
| + | !Weight | ||
| + | |- | ||
| + | |no | ||
| + | |no | ||
| + | |no | ||
| + | |775kg | ||
| + | |- | ||
| + | !Onboard rollbars | ||
| + | !Onboard brake bias | ||
| + | !Pit limiter | ||
| + | !Weight distribution | ||
| + | |- | ||
| + | |no | ||
| + | |no | ||
| + | |yes | ||
| + | |62.8/37.2 | ||
| + | |- | ||
| + | !Turbo | ||
| + | !Headlights | ||
| + | !Wheelbase | ||
| + | ! | ||
| + | |- | ||
| + | |no | ||
| + | |no | ||
| + | |2.37m | ||
| + | | | ||
| + | |- | ||
| + | |} | ||
| + | |||
| + | ==Passat Hot Cars== | ||
| + | {| class="wikitable" style="text-align:center; style="font-size:90%; width="65%" | ||
| + | |rowspan=9 style="width:250px"|[[File:250pas_hotcars.png|link=]] | ||
| + | |- | ||
| + | !Displacement | ||
| + | !Power | ||
| + | !Torque | ||
| + | !Transmission | ||
| + | |- | ||
| + | |1.80l | ||
| + | |165hp | ||
| + | |211Nm | ||
| + | |4 speed H-Pattern | ||
| + | |- | ||
| + | !Electronics | ||
| + | !Boost | ||
| + | !DRS | ||
| + | !Weight | ||
| + | |- | ||
| + | |no | ||
| + | |no | ||
| + | |no | ||
| + | |785kg | ||
| + | |- | ||
| + | !Onboard rollbars | ||
| + | !Onboard brake bias | ||
| + | !Pit limiter | ||
| + | !Weight distribution | ||
| + | |- | ||
| + | |no | ||
| + | |no | ||
| + | |yes | ||
| + | |63.0/37.0 | ||
| + | |- | ||
| + | !Turbo | ||
| + | !Headlights | ||
| + | !Wheelbase | ||
| + | ! | ||
| + | |- | ||
| + | |no | ||
| + | |no | ||
| + | |2.43m | ||
| + | | | ||
| + | |- | ||
| + | |} | ||
| + | |||
| + | =P1 Gen 1= | ||
| + | |||
| + | ==Metalmoro AJR Chevy V8== | ||
| + | {| class="wikitable" style="text-align:center; style="font-size:90%; width="65%" | ||
| + | |rowspan=9 style="width:250px"|[[File:250p1_chevy.png|link=]] | ||
| + | |- | ||
| + | !Displacement | ||
| + | !Power | ||
| + | !Torque | ||
| + | !Transmission | ||
| + | |- | ||
| + | |6.20l | ||
| + | |594hp | ||
| + | |700Nm | ||
| + | |6 speed Seqiential | ||
| + | |- | ||
| + | !Electronics | ||
| + | !Boost | ||
| + | !DRS | ||
| + | !Weight | ||
| + | |- | ||
| + | |ABS TC | ||
| + | |no | ||
| + | |yes | ||
| + | |960kg | ||
| + | |- | ||
| + | !Onboard rollbars | ||
| + | !Onboard brake bias | ||
| + | !Pit limiter | ||
| + | !Weight distribution | ||
| + | |- | ||
| + | |yes | ||
| + | |yes | ||
| + | |yes | ||
| + | |42.0/58.0 | ||
| + | |- | ||
| + | !Turbo | ||
| + | !Headlights | ||
| + | !Wheelbase | ||
| + | ! | ||
| + | |- | ||
| + | |no | ||
| + | |yes | ||
| + | |2.72m | ||
| + | | | ||
| + | |- | ||
| + | |} | ||
| + | |||
| + | ==Metalmoro AJR Honda== | ||
| + | {| class="wikitable" style="text-align:center; style="font-size:90%; width="65%" | ||
| + | |rowspan=9 style="width:250px"|[[File:250p1_honda.png|link=]] | ||
| + | |- | ||
| + | !Displacement | ||
| + | !Power | ||
| + | !Torque | ||
| + | !Transmission | ||
| + | |- | ||
| + | |2.40l | ||
| + | |579hp | ||
| + | |663Nm | ||
| + | |6 speed Seqiential | ||
| + | |- | ||
| + | !Electronics | ||
| + | !Boost | ||
| + | !DRS | ||
| + | !Weight | ||
| + | |- | ||
| + | |ABS TC | ||
| + | |no | ||
| + | |yes | ||
| + | |935kg | ||
| + | |- | ||
| + | !Onboard rollbars | ||
| + | !Onboard brake bias | ||
| + | !Pit limiter | ||
| + | !Weight distribution | ||
| + | |- | ||
| + | |yes | ||
| + | |yes | ||
| + | |yes | ||
| + | |42.8/57.2 | ||
| + | |- | ||
| + | !Turbo | ||
| + | !Headlights | ||
| + | !Wheelbase | ||
| + | ! | ||
| + | |- | ||
| + | |yes | ||
| + | |yes | ||
| + | |2.72m | ||
| + | | | ||
| + | |- | ||
| + | |} | ||
| + | |||
| + | ==Metalmoro AJR Judd== | ||
| + | {| class="wikitable" style="text-align:center; style="font-size:90%; width="65%" | ||
| + | |rowspan=9 style="width:250px"|[[File:250p1_judd.png|link=]] | ||
| + | |- | ||
| + | !Displacement | ||
| + | !Power | ||
| + | !Torque | ||
| + | !Transmission | ||
| + | |- | ||
| + | |4.20l | ||
| + | |556hp | ||
| + | |432Nm | ||
| + | |6 speed Seqiential | ||
| + | |- | ||
| + | !Electronics | ||
| + | !Boost | ||
| + | !DRS | ||
| + | !Weight | ||
| + | |- | ||
| + | |no | ||
| + | |no | ||
| + | |no | ||
| + | |950kg | ||
| + | |- | ||
| + | !Onboard rollbars | ||
| + | !Onboard brake bias | ||
| + | !Pit limiter | ||
| + | !Weight distribution | ||
| + | |- | ||
| + | |yes | ||
| + | |yes | ||
| + | |yes | ||
| + | |42.5/57.5 | ||
| + | |- | ||
| + | !Turbo | ||
| + | !Headlights | ||
| + | !Wheelbase | ||
| + | ! | ||
| + | |- | ||
| + | |no | ||
| + | |yes | ||
| + | |2.72m | ||
| + | | | ||
| + | |- | ||
| + | |} | ||
| + | |||
| + | ==Metalmoro AJR V6 Turbo== | ||
| + | {| class="wikitable" style="text-align:center; style="font-size:90%; width="65%" | ||
| + | |rowspan=9 style="width:250px"|[[File:250p1_pt.png|link=]] | ||
| + | |- | ||
| + | !Displacement | ||
| + | !Power | ||
| + | !Torque | ||
| + | !Transmission | ||
| + | |- | ||
| + | |3.50l | ||
| + | |641hp | ||
| + | |579Nm | ||
| + | |6 speed Seqiential | ||
| + | |- | ||
| + | !Electronics | ||
| + | !Boost | ||
| + | !DRS | ||
| + | !Weight | ||
| + | |- | ||
| + | |no | ||
| + | |no | ||
| + | |no | ||
| + | |960kg | ||
| + | |- | ||
| + | !Onboard rollbars | ||
| + | !Onboard brake bias | ||
| + | !Pit limiter | ||
| + | !Weight distribution | ||
| + | |- | ||
| + | |yes | ||
| + | |yes | ||
| + | |yes | ||
| + | |42.4/57.6 | ||
| + | |- | ||
| + | !Turbo | ||
| + | !Headlights | ||
| + | !Wheelbase | ||
| + | ! | ||
| + | |- | ||
| + | |no | ||
| + | |yes | ||
| + | |2.72m | ||
| + | | | ||
| + | |- | ||
| + | |} | ||
| + | |||
| + | ==Ginetta G58== | ||
| + | {| class="wikitable" style="text-align:center; style="font-size:90%; width="65%" | ||
| + | |rowspan=9 style="width:250px"|[[File:250p1_g57.png|link=]] | ||
| + | |- | ||
| + | !Displacement | ||
| + | !Power | ||
| + | !Torque | ||
| + | !Transmission | ||
| + | |- | ||
| + | |6.20l | ||
| + | |564hp | ||
| + | |663Nm | ||
| + | |6 speed Seqiential | ||
| + | |- | ||
| + | !Electronics | ||
| + | !Boost | ||
| + | !DRS | ||
| + | !Weight | ||
| + | |- | ||
| + | |ABS TC | ||
| + | |no | ||
| + | |no | ||
| + | |1020kg | ||
| + | |- | ||
| + | !Onboard rollbars | ||
| + | !Onboard brake bias | ||
| + | !Pit limiter | ||
| + | !Weight distribution | ||
| + | |- | ||
| + | |yes | ||
| + | |yes | ||
| + | |yes | ||
| + | |46.0/54.0 | ||
| + | |- | ||
| + | !Turbo | ||
| + | !Headlights | ||
| + | !Wheelbase | ||
| + | ! | ||
| + | |- | ||
| + | |no | ||
| + | |yes | ||
| + | |2.90m | ||
| + | | | ||
| + | |- | ||
| + | |} | ||
| + | |||
| + | =P1 Gen 2= | ||
| + | |||
| + | ==Metalmoro AJR Gen2 Chevrolet== | ||
| + | {| class="wikitable" style="text-align:center; style="font-size:90%; width="65%" | ||
| + | |rowspan=9 style="width:250px"|[[File:250p1_chevy2.png|link=]] | ||
| + | |- | ||
| + | !Displacement | ||
| + | !Power | ||
| + | !Torque | ||
| + | !Transmission | ||
| + | |- | ||
| + | |6.20l | ||
| + | |593hp | ||
| + | |700Nm | ||
| + | |6 speed Seqiential | ||
| + | |- | ||
| + | !Electronics | ||
| + | !Boost | ||
| + | !DRS | ||
| + | !Weight | ||
| + | |- | ||
| + | |ABS TC | ||
| + | |no | ||
| + | |yes | ||
| + | |1000kg | ||
| + | |- | ||
| + | !Onboard rollbars | ||
| + | !Onboard brake bias | ||
| + | !Pit limiter | ||
| + | !Weight distribution | ||
| + | |- | ||
| + | |no | ||
| + | |yes | ||
| + | |yes | ||
| + | |40.0/60.0 | ||
| + | |- | ||
| + | !Turbo | ||
| + | !Headlights | ||
| + | !Wheelbase | ||
| + | ! | ||
| + | |- | ||
| + | |no | ||
| + | |yes | ||
| + | |2.90m | ||
| + | | | ||
| + | |- | ||
| + | |} | ||
| + | |||
| + | ==Metalmoro AJR Gen2 Honda== | ||
| + | {| class="wikitable" style="text-align:center; style="font-size:90%; width="65%" | ||
| + | |rowspan=9 style="width:250px"|[[File:250p1_honda2.png|link=]] | ||
| + | |- | ||
| + | !Displacement | ||
| + | !Power | ||
| + | !Torque | ||
| + | !Transmission | ||
| + | |- | ||
| + | |2.40l | ||
| + | |575hp | ||
| + | |658Nm | ||
| + | |6 speed Seqiential | ||
| + | |- | ||
| + | !Electronics | ||
| + | !Boost | ||
| + | !DRS | ||
| + | !Weight | ||
| + | |- | ||
| + | |ABS TC | ||
| + | |no | ||
| + | |yes | ||
| + | |1100kg | ||
| + | |- | ||
| + | !Onboard rollbars | ||
| + | !Onboard brake bias | ||
| + | !Pit limiter | ||
| + | !Weight distribution | ||
| + | |- | ||
| + | |no | ||
| + | |yes | ||
| + | |yes | ||
| + | |40.0/60.0 | ||
| + | |- | ||
| + | !Turbo | ||
| + | !Headlights | ||
| + | !Wheelbase | ||
| + | ! | ||
| + | |- | ||
| + | |yes | ||
| + | |yes | ||
| + | |2.90m | ||
| + | | | ||
| + | |- | ||
| + | |} | ||
| + | |||
| + | ==Metalmoro AJR Gen2 Nissan== | ||
| + | {| class="wikitable" style="text-align:center; style="font-size:90%; width="65%" | ||
| + | |rowspan=9 style="width:250px"|[[File:250p1_nissan2.png|link=]] | ||
| + | |- | ||
| + | !Displacement | ||
| + | !Power | ||
| + | !Torque | ||
| + | !Transmission | ||
| + | |- | ||
| + | |5.60l | ||
| + | |561hp | ||
| + | |618Nm | ||
| + | |6 speed Seqiential | ||
| + | |- | ||
| + | !Electronics | ||
| + | !Boost | ||
| + | !DRS | ||
| + | !Weight | ||
| + | |- | ||
| + | |no | ||
| + | |no | ||
| + | |yes | ||
| + | |1100kg | ||
| + | |- | ||
| + | !Onboard rollbars | ||
| + | !Onboard brake bias | ||
| + | !Pit limiter | ||
| + | !Weight distribution | ||
| + | |- | ||
| + | |no | ||
| + | |yes | ||
| + | |yes | ||
| + | |40.0/60.0 | ||
| + | |- | ||
| + | !Turbo | ||
| + | !Headlights | ||
| + | !Wheelbase | ||
| + | ! | ||
| + | |- | ||
| + | |yes | ||
| + | |yes | ||
| + | |2.90m | ||
| + | | | ||
| + | |- | ||
| + | |} | ||
| + | |||
| + | ==Ginetta G58 Gen2== | ||
| + | {| class="wikitable" style="text-align:center; style="font-size:90%; width="65%" | ||
| + | |rowspan=9 style="width:250px"|[[File:250p1_g57.png|link=]] | ||
| + | |- | ||
| + | !Displacement | ||
| + | !Power | ||
| + | !Torque | ||
| + | !Transmission | ||
| + | |- | ||
| + | |6.20l | ||
| + | |564hp | ||
| + | |663Nm | ||
| + | |6 speed Seqiential | ||
| + | |- | ||
| + | !Electronics | ||
| + | !Boost | ||
| + | !DRS | ||
| + | !Weight | ||
| + | |- | ||
| + | |ABS TC | ||
| + | |no | ||
| + | |no | ||
| + | |1020kg | ||
| + | |- | ||
| + | !Onboard rollbars | ||
| + | !Onboard brake bias | ||
| + | !Pit limiter | ||
| + | !Weight distribution | ||
| + | |- | ||
| + | |no | ||
| + | |yes | ||
| + | |yes | ||
| + | |46.0/54.0 | ||
| + | |- | ||
| + | !Turbo | ||
| + | !Headlights | ||
| + | !Wheelbase | ||
| + | ! | ||
| + | |- | ||
| + | |no | ||
| + | |yes | ||
| + | |2.90m | ||
| + | | | ||
| + | |- | ||
| + | |} | ||
| + | |||
| + | ==Sigma P1 G5== | ||
| + | {| class="wikitable" style="text-align:center; style="font-size:90%; width="65%" | ||
| + | |rowspan=9 style="width:250px"|[[File:250p1_sigma2.png|link=]] | ||
| + | |- | ||
| + | !Displacement | ||
| + | !Power | ||
| + | !Torque | ||
| + | !Transmission | ||
| + | |- | ||
| + | |6.90l | ||
| + | |573hp | ||
| + | |700Nm | ||
| + | |6 speed Seqiential | ||
| + | |- | ||
| + | !Electronics | ||
| + | !Boost | ||
| + | !DRS | ||
| + | !Weight | ||
| + | |- | ||
| + | |ABS TC | ||
| + | |no | ||
| + | |yes | ||
| + | |1050kg | ||
| + | |- | ||
| + | !Onboard rollbars | ||
| + | !Onboard brake bias | ||
| + | !Pit limiter | ||
| + | !Weight distribution | ||
| + | |- | ||
| + | |no | ||
| + | |yes | ||
| + | |yes | ||
| + | |40.0/60.0 | ||
| + | |- | ||
| + | !Turbo | ||
| + | !Headlights | ||
| + | !Wheelbase | ||
| + | ! | ||
| + | |- | ||
| + | |no | ||
| + | |yes | ||
| + | |2.98m | ||
| + | | | ||
| + | |- | ||
| + | |} | ||
| + | |||
| + | =BMW M1 Procar= | ||
| + | |||
| + | ==BMW M1 Procar== | ||
| + | {| class="wikitable" style="text-align:center; style="font-size:90%; width="65%" | ||
| + | |rowspan=7 style="width:250px"|[[File:Bmw_m1.png|link=]] | ||
| + | |- | ||
| + | !Power | ||
| + | !Weight | ||
| + | !Torque | ||
| + | !Transmission | ||
| + | |- | ||
| + | |485hp | ||
| + | |1100kg | ||
| + | |307Nm | ||
| + | |5 speed H-Pattern | ||
| + | |- | ||
| + | !Electronics | ||
| + | !Turbo | ||
| + | !Boost | ||
| + | !DRS | ||
| + | |- | ||
| + | |no | ||
| + | |no | ||
| + | |no | ||
| + | |no | ||
| + | |- | ||
| + | !Onboard rollbars | ||
| + | !Onboard brake bias | ||
| + | !Pit limiter | ||
| + | !Headlights | ||
| + | |- | ||
| + | |no | ||
| + | |yes | ||
| + | |yes | ||
| + | |yes | ||
| + | |- | ||
| + | |} | ||
| + | |||
| + | =RX= | ||
| + | |||
| + | ==Citroen DS3 RX== | ||
| + | {| class="wikitable" style="text-align:center; style="font-size:90%; width="65%" | ||
| + | |rowspan=9 style="width:250px"|[[File:250ds3rx.png|link=]] | ||
| + | |- | ||
| + | !Displacement | ||
| + | !Power | ||
| + | !Torque | ||
| + | !Transmission | ||
| + | |- | ||
| + | |2.00l | ||
| + | |595hp | ||
| + | |920Nm | ||
| + | |6 speed Seqiential | ||
| + | |- | ||
| + | !Electronics | ||
| + | !Boost | ||
| + | !DRS | ||
| + | !Weight | ||
| + | |- | ||
| + | |no | ||
| + | |no | ||
| + | |no | ||
| + | |1300kg | ||
| + | |- | ||
| + | !Onboard rollbars | ||
| + | !Onboard brake bias | ||
| + | !Pit limiter | ||
| + | !Weight distribution | ||
| + | |- | ||
| + | |no | ||
| + | |no | ||
| + | |yes | ||
| + | |52.0/48.0 | ||
| + | |- | ||
| + | !Turbo | ||
| + | !Headlights | ||
| + | !Wheelbase | ||
| + | ! | ||
| + | |- | ||
| + | |yes | ||
| + | |no | ||
| + | |2.46m | ||
| + | | | ||
| + | |- | ||
| + | |} | ||
| + | |||
| + | ==Mini Countryman R60 RX== | ||
| + | {| class="wikitable" style="text-align:center; style="font-size:90%; width="65%" | ||
| + | |rowspan=9 style="width:250px"|[[File:250minicountrx.png|link=]] | ||
| + | |- | ||
| + | !Displacement | ||
| + | !Power | ||
| + | !Torque | ||
| + | !Transmission | ||
| + | |- | ||
| + | |2.00l | ||
| + | |595hp | ||
| + | |920Nm | ||
| + | |6 speed Seqiential | ||
| + | |- | ||
| + | !Electronics | ||
| + | !Boost | ||
| + | !DRS | ||
| + | !Weight | ||
| + | |- | ||
| + | |no | ||
| + | |no | ||
| + | |no | ||
| + | |1300kg | ||
| + | |- | ||
| + | !Onboard rollbars | ||
| + | !Onboard brake bias | ||
| + | !Pit limiter | ||
| + | !Weight distribution | ||
| + | |- | ||
| + | |no | ||
| + | |no | ||
| + | |yes | ||
| + | |52.0/48.0 | ||
| + | |- | ||
| + | !Turbo | ||
| + | !Headlights | ||
| + | !Wheelbase | ||
| + | ! | ||
| + | |- | ||
| + | |yes | ||
| + | |no | ||
| + | |2.61m | ||
| + | | | ||
| + | |- | ||
| + | |} | ||
| + | |||
| + | ==Mitsubishi Lancer Evo10 RX== | ||
| + | {| class="wikitable" style="text-align:center; style="font-size:90%; width="65%" | ||
| + | |rowspan=9 style="width:250px"|[[File:250lancerrx.png|link=]] | ||
| + | |- | ||
| + | !Displacement | ||
| + | !Power | ||
| + | !Torque | ||
| + | !Transmission | ||
| + | |- | ||
| + | |2.00l | ||
| + | |595hp | ||
| + | |920Nm | ||
| + | |6 speed Seqiential | ||
| + | |- | ||
| + | !Electronics | ||
| + | !Boost | ||
| + | !DRS | ||
| + | !Weight | ||
| + | |- | ||
| + | |no | ||
| + | |no | ||
| + | |no | ||
| + | |1300kg | ||
| + | |- | ||
| + | !Onboard rollbars | ||
| + | !Onboard brake bias | ||
| + | !Pit limiter | ||
| + | !Weight distribution | ||
| + | |- | ||
| + | |no | ||
| + | |no | ||
| + | |yes | ||
| + | |52.0/48.0 | ||
| + | |- | ||
| + | !Turbo | ||
| + | !Headlights | ||
| + | !Wheelbase | ||
| + | ! | ||
| + | |- | ||
| + | |yes | ||
| + | |no | ||
| + | |2.46m | ||
| + | | | ||
| + | |- | ||
| + | |} | ||
| + | |||
| + | ==Volksagen Polo RX== | ||
| + | {| class="wikitable" style="text-align:center; style="font-size:90%; width="65%" | ||
| + | |rowspan=9 style="width:250px"|[[File:250polorx.png|link=]] | ||
| + | |- | ||
| + | !Displacement | ||
| + | !Power | ||
| + | !Torque | ||
| + | !Transmission | ||
| + | |- | ||
| + | |2.00l | ||
| + | |595hp | ||
| + | |920Nm | ||
| + | |6 speed Seqiential | ||
| + | |- | ||
| + | !Electronics | ||
| + | !Boost | ||
| + | !DRS | ||
| + | !Weight | ||
| + | |- | ||
| + | |no | ||
| + | |no | ||
| + | |no | ||
| + | |1300kg | ||
| + | |- | ||
| + | !Onboard rollbars | ||
| + | !Onboard brake bias | ||
| + | !Pit limiter | ||
| + | !Weight distribution | ||
| + | |- | ||
| + | |no | ||
| + | |no | ||
| + | |yes | ||
| + | |52.0/48.0 | ||
| + | |- | ||
| + | !Turbo | ||
| + | !Headlights | ||
| + | !Wheelbase | ||
| + | ! | ||
| + | |- | ||
| + | |yes | ||
| + | |no | ||
| + | |2.48m | ||
| + | | | ||
| + | |- | ||
| + | |} | ||
| + | |||
| + | =Vintage Touring Cars Tier 1= | ||
| + | |||
| + | ==BMW 2002 Turbo== | ||
| + | {| class="wikitable" style="text-align:center; style="font-size:90%; width="65%" | ||
| + | |rowspan=9 style="width:250px"|[[File:250bmw_2002_turbo.png|link=]] | ||
| + | |- | ||
| + | !Displacement | ||
| + | !Power | ||
| + | !Torque | ||
| + | !Transmission | ||
| + | |- | ||
| + | |1.99l | ||
| + | |197hp | ||
| + | |256Nm | ||
| + | |5 speed H-Pattern | ||
| + | |- | ||
| + | !Electronics | ||
| + | !Boost | ||
| + | !DRS | ||
| + | !Weight | ||
| + | |- | ||
| + | |no | ||
| + | |no | ||
| + | |no | ||
| + | |1072kg | ||
| + | |- | ||
| + | !Onboard rollbars | ||
| + | !Onboard brake bias | ||
| + | !Pit limiter | ||
| + | !Weight distribution | ||
| + | |- | ||
| + | |no | ||
| + | |no | ||
| + | |yes | ||
| + | |50.5/49.5 | ||
| + | |- | ||
| + | !Turbo | ||
| + | !Headlights | ||
| + | !Wheelbase | ||
| + | ! | ||
| + | |- | ||
| + | |yes | ||
| + | |yes | ||
| + | |2.51m | ||
| + | | | ||
| + | |- | ||
| + | |} | ||
| + | |||
| + | =Vintage Touring Cars Tier 2= | ||
| + | |||
| + | ==Mini Cooper S 1965== | ||
| + | {| class="wikitable" style="text-align:center; style="font-size:90%; width="65%" | ||
| + | |rowspan=9 style="width:250px"|[[File:250minis6523.png|link=]] | ||
| + | |- | ||
| + | !Displacement | ||
| + | !Power | ||
| + | !Torque | ||
| + | !Transmission | ||
| + | |- | ||
| + | |1.27l | ||
| + | |108hp | ||
| + | |138Nm | ||
| + | |4 speed H-Pattern | ||
| + | |- | ||
| + | !Electronics | ||
| + | !Boost | ||
| + | !DRS | ||
| + | !Weight | ||
| + | |- | ||
| + | |no | ||
| + | |no | ||
| + | |no | ||
| + | |700kg | ||
| + | |- | ||
| + | !Onboard rollbars | ||
| + | !Onboard brake bias | ||
| + | !Pit limiter | ||
| + | !Weight distribution | ||
| + | |- | ||
| + | |no | ||
| + | |no | ||
| + | |yes | ||
| + | |61.0/39.0 | ||
| + | |- | ||
| + | !Turbo | ||
| + | !Headlights | ||
| + | !Wheelbase | ||
| + | ! | ||
| + | |- | ||
| + | |no | ||
| + | |yes | ||
| + | |2.03m | ||
| + | | | ||
| + | |- | ||
| + | |} | ||
| + | |||
| + | ==Lotus 23== | ||
| + | {| class="wikitable" style="text-align:center; style="font-size:90%; width="65%" | ||
| + | |rowspan=9 style="width:250px"|[[File:250lotus23.png|link=]] | ||
| + | |- | ||
| + | !Displacement | ||
| + | !Power | ||
| + | !Torque | ||
| + | !Transmission | ||
| + | |- | ||
| + | |1.10l | ||
| + | |95hp | ||
| + | |105Nm | ||
| + | |4 speed H-Pattern | ||
| + | |- | ||
| + | !Electronics | ||
| + | !Boost | ||
| + | !DRS | ||
| + | !Weight | ||
| + | |- | ||
| + | |no | ||
| + | |no | ||
| + | |no | ||
| + | |540kg | ||
| + | |- | ||
| + | !Onboard rollbars | ||
| + | !Onboard brake bias | ||
| + | !Pit limiter | ||
| + | !Weight distribution | ||
| + | |- | ||
| + | |no | ||
| + | |no | ||
| + | |yes | ||
| + | |42.0/58.0 | ||
| + | |- | ||
| + | !Turbo | ||
| + | !Headlights | ||
| + | !Wheelbase | ||
| + | ! | ||
| + | |- | ||
| + | |no | ||
| + | |yes | ||
| + | |2.29m | ||
| + | | | ||
| + | |- | ||
| + | |} | ||
| + | |||
| + | =GT Classics= | ||
| + | ==Porsche 911 RSR 74== | ||
| + | {| class="wikitable" style="text-align:center; style="font-size:90%; width="65%" | ||
| + | |rowspan=7 style="width:250px"|[[File:25091174.jpg|link=]] | ||
| + | |- | ||
| + | !Power | ||
| + | !Weight | ||
| + | !Torque | ||
| + | !Transmission | ||
| + | |- | ||
| + | |330hp | ||
| + | |980kg | ||
| + | |314Nm | ||
| + | |5 speed H-Pattern | ||
| + | |- | ||
| + | !Electronics | ||
| + | !Turbo | ||
| + | !Boost | ||
| + | !DRS | ||
| + | |- | ||
| + | |no | ||
| + | |no | ||
| + | |no | ||
| + | |no | ||
| + | |- | ||
| + | !Onboard rollbars | ||
| + | !Onboard brake bias | ||
| + | !Pit limiter | ||
| + | !Headlights | ||
| + | |- | ||
| + | |no | ||
| + | |yes | ||
| + | |yes | ||
| + | |yes | ||
| + | |- | ||
| + | |} | ||
| + | |||
| + | ==Chevrolet Corvette C3== | ||
| + | {| class="wikitable" style="text-align:center; style="font-size:90%; width="65%" | ||
| + | |rowspan=7 style="width:250px"|[[File:250c3.jpg|link=]] | ||
| + | |- | ||
| + | !Power | ||
| + | !Weight | ||
| + | !Torque | ||
| + | !Transmission | ||
| + | |- | ||
| + | |540hp | ||
| + | |1380kg | ||
| + | |530Nm | ||
| + | |4 speed H-Pattern | ||
| + | |- | ||
| + | !Electronics | ||
| + | !Turbo | ||
| + | !Boost | ||
| + | !DRS | ||
| + | |- | ||
| + | |no | ||
| + | |no | ||
| + | |no | ||
| + | |no | ||
| + | |- | ||
| + | !Onboard rollbars | ||
| + | !Onboard brake bias | ||
| + | !Pit limiter | ||
| + | !Headlights | ||
| + | |- | ||
| + | |no | ||
| + | |no | ||
| + | |yes | ||
| + | |yes | ||
| + | |- | ||
| + | |} | ||
| + | |||
| + | =Street Cars= | ||
| + | ==Chevrolet Camaro SS== | ||
| + | {| class="wikitable" style="text-align:center; style="font-size:90%; width="65%" | ||
| + | |rowspan=9 style="width:250px"|[[File:Camaro_ss.png|link=]] | ||
| + | |- | ||
| + | !Displacement | ||
| + | !Power | ||
| + | !Torque | ||
| + | !Transmission | ||
| + | |- | ||
| + | |6.20l | ||
| + | |446hp | ||
| + | |596Nm | ||
| + | |6 speed H-Pattern | ||
| + | |- | ||
| + | !Electronics | ||
| + | !Boost | ||
| + | !DRS | ||
| + | !Weight | ||
| + | |- | ||
| + | |ABS TC | ||
| + | |no | ||
| + | |no | ||
| + | |1751kg | ||
| + | |- | ||
| + | !Onboard rollbars | ||
| + | !Onboard brake bias | ||
| + | !Pit limiter | ||
| + | !Weight distribution | ||
| + | |- | ||
| + | |no | ||
| + | |no | ||
| + | |yes | ||
| + | |56.5/43.5 | ||
| + | |- | ||
| + | !Turbo | ||
| + | !Headlights | ||
| + | !Wheelbase | ||
| + | ! | ||
| + | |- | ||
| + | |no | ||
| + | |yes | ||
| + | |2.81m | ||
| + | | | ||
| + | |- | ||
| + | |} | ||
| + | |||
| + | =TSI Cup= | ||
| + | ==VW Virtus GTS== | ||
| + | {| class="wikitable" style="text-align:center; style="font-size:90%; width="65%" | ||
| + | |rowspan=9 style="width:250px"|[[File:VirtusGTS.jpg|link=]] | ||
| + | |- | ||
| + | !Displacement | ||
| + | !Power | ||
| + | !Torque | ||
| + | !Transmission | ||
| + | |- | ||
| + | |1.00l | ||
| + | |148hp | ||
| + | |255Nm | ||
| + | |6 speed Seqiential | ||
| + | |- | ||
| + | !Electronics | ||
| + | !Boost | ||
| + | !DRS | ||
| + | !Weight | ||
| + | |- | ||
| + | |ABS TC | ||
| + | |no | ||
| + | |no | ||
| + | |1340kg | ||
| + | |- | ||
| + | !Onboard rollbars | ||
| + | !Onboard brake bias | ||
| + | !Pit limiter | ||
| + | !Weight distribution | ||
| + | |- | ||
| + | |no | ||
| + | |no | ||
| + | |yes | ||
| + | |53.0/47.0 | ||
| + | |- | ||
| + | !Turbo | ||
| + | !Headlights | ||
| + | !Wheelbase | ||
| + | ! | ||
| + | |- | ||
| + | |yes | ||
| + | |yes | ||
| + | |2.65m | ||
| + | | | ||
| + | |- | ||
| + | |} | ||
| + | |||
| + | =Kart= | ||
| + | ==125CC== | ||
| + | {| class="wikitable" style="text-align:center; style="font-size:90%; width="65%" | ||
| + | |rowspan=9 style="width:250px"|[[File:125cc.png|link=]] | ||
| + | |- | ||
| + | !Displacement | ||
| + | !Power | ||
| + | !Torque | ||
| + | !Transmission | ||
| + | |- | ||
| + | |0.13l | ||
| + | |32hp | ||
| + | |21Nm | ||
| + | |1 speed Seqiential | ||
| + | |- | ||
| + | !Electronics | ||
| + | !Boost | ||
| + | !DRS | ||
| + | !Weight | ||
| + | |- | ||
| + | |no | ||
| + | |no | ||
| + | |no | ||
| + | |155kg | ||
| + | |- | ||
| + | !Onboard rollbars | ||
| + | !Onboard brake bias | ||
| + | !Pit limiter | ||
| + | !Weight distribution | ||
| + | |- | ||
| + | |no | ||
| + | |no | ||
| + | |yes | ||
| + | |43.2/56.8 | ||
| + | |- | ||
| + | !Turbo | ||
| + | !Headlights | ||
| + | !Wheelbase | ||
| + | ! | ||
| + | |- | ||
| + | |no | ||
| + | |no | ||
| + | |1.04m | ||
| + | | | ||
| + | |- | ||
| + | |} | ||
| + | |||
| + | ==GX390 Race== | ||
| + | {| class="wikitable" style="text-align:center; style="font-size:90%; width="65%" | ||
| + | |rowspan=9 style="width:250px"|[[File:GX390Race.png|link=]] | ||
| + | |- | ||
| + | !Displacement | ||
| + | !Power | ||
| + | !Torque | ||
| + | !Transmission | ||
| + | |- | ||
| + | |0.39l | ||
| + | |11hp | ||
| + | |25Nm | ||
| + | |1 speed Seqiential | ||
| + | |- | ||
| + | !Electronics | ||
| + | !Boost | ||
| + | !DRS | ||
| + | !Weight | ||
| + | |- | ||
| + | |no | ||
| + | |no | ||
| + | |no | ||
| + | |170kg | ||
| + | |- | ||
| + | !Onboard rollbars | ||
| + | !Onboard brake bias | ||
| + | !Pit limiter | ||
| + | !Weight distribution | ||
| + | |- | ||
| + | |no | ||
| + | |no | ||
| + | |yes | ||
| + | |42.4/57.6 | ||
| + | |- | ||
| + | !Turbo | ||
| + | !Headlights | ||
| + | !Wheelbase | ||
| + | ! | ||
| + | |- | ||
| + | |no | ||
| + | |no | ||
| + | |1.03m | ||
| + | | | ||
| + | |- | ||
| + | |} | ||
| + | |||
| + | ==GX390 Rental== | ||
| + | {| class="wikitable" style="text-align:center; style="font-size:90%; width="65%" | ||
| + | |rowspan=9 style="width:250px"|[[File:GX390Rental.png|link=]] | ||
| + | |- | ||
| + | !Displacement | ||
| + | !Power | ||
| + | !Torque | ||
| + | !Transmission | ||
| + | |- | ||
| + | |0.39l | ||
| + | |12hp | ||
| + | |25Nm | ||
| + | |1 speed Seqiential | ||
| + | |- | ||
| + | !Electronics | ||
| + | !Boost | ||
| + | !DRS | ||
| + | !Weight | ||
| + | |- | ||
| + | |no | ||
| + | |no | ||
| + | |no | ||
| + | |190kg | ||
| + | |- | ||
| + | !Onboard rollbars | ||
| + | !Onboard brake bias | ||
| + | !Pit limiter | ||
| + | !Weight distribution | ||
| + | |- | ||
| + | |no | ||
| + | |no | ||
| + | |yes | ||
| + | |42.4/57.6 | ||
| + | |- | ||
| + | !Turbo | ||
| + | !Headlights | ||
| + | !Wheelbase | ||
| + | ! | ||
| + | |- | ||
| + | |no | ||
| + | |no | ||
| + | |1.03m | ||
| + | | | ||
| + | |- | ||
| + | |} | ||
| + | |||
| + | ==125cc Shifter== | ||
| + | {| class="wikitable" style="text-align:center; style="font-size:90%; width="65%" | ||
| + | |rowspan=9 style="width:250px"|[[File:125shifter.png|link=]] | ||
| + | |- | ||
| + | !Displacement | ||
| + | !Power | ||
| + | !Torque | ||
| + | !Transmission | ||
| + | |- | ||
| + | |0.13l | ||
| + | |34hp | ||
| + | |22Nm | ||
| + | |6 speed Seqiential | ||
| + | |- | ||
| + | !Electronics | ||
| + | !Boost | ||
| + | !DRS | ||
| + | !Weight | ||
| + | |- | ||
| + | |no | ||
| + | |no | ||
| + | |no | ||
| + | |155kg | ||
| + | |- | ||
| + | !Onboard rollbars | ||
| + | !Onboard brake bias | ||
| + | !Pit limiter | ||
| + | !Weight distribution | ||
| + | |- | ||
| + | |no | ||
| + | |no | ||
| + | |yes | ||
| + | |42.2/57.8 | ||
| + | |- | ||
| + | !Turbo | ||
| + | !Headlights | ||
| + | !Wheelbase | ||
| + | ! | ||
| + | |- | ||
| + | |no | ||
| + | |no | ||
| + | |1.03m | ||
| + | | | ||
| + | |- | ||
| + | |} | ||
| + | |||
| + | ==Superkart 250cc== | ||
| + | {| class="wikitable" style="text-align:center; style="font-size:90%; width="65%" | ||
| + | |rowspan=9 style="width:250px"|[[File:Superkart250cc.png|link=]] | ||
| + | |- | ||
| + | !Displacement | ||
| + | !Power | ||
| + | !Torque | ||
| + | !Transmission | ||
| + | |- | ||
| + | |0.25l | ||
| + | |93hp | ||
| + | |53Nm | ||
| + | |6 speed Seqiential | ||
| + | |- | ||
| + | !Electronics | ||
| + | !Boost | ||
| + | !DRS | ||
| + | !Weight | ||
| + | |- | ||
| + | |no | ||
| + | |no | ||
| + | |no | ||
| + | |220kg | ||
| + | |- | ||
| + | !Onboard rollbars | ||
| + | !Onboard brake bias | ||
| + | !Pit limiter | ||
| + | !Weight distribution | ||
| + | |- | ||
| + | |no | ||
| + | |no | ||
| + | |yes | ||
| + | |42.2/57.8 | ||
| + | |- | ||
| + | !Turbo | ||
| + | !Headlights | ||
| + | !Wheelbase | ||
| + | ! | ||
| + | |- | ||
| + | |no | ||
| + | |no | ||
| + | |1.04m | ||
| + | | | ||
| + | |- | ||
| + | |} | ||
| + | |||
| + | =Kart Cross= | ||
| + | {| class="wikitable" style="text-align:center; style="font-size:90%; width="65%" | ||
| + | |rowspan=9 style="width:250px"|[[File:250rally_kart.png|link=]] | ||
| + | |- | ||
| + | !Displacement | ||
| + | !Power | ||
| + | !Torque | ||
| + | !Transmission | ||
| + | |- | ||
| + | |0.60l | ||
| + | |133hp | ||
| + | |90Nm | ||
| + | |6 Speed Seqiential | ||
| + | |- | ||
| + | !Electronics | ||
| + | !Boost | ||
| + | !DRS | ||
| + | !Weight | ||
| + | |- | ||
| + | |no | ||
| + | |no | ||
| + | |no | ||
| + | |425kg | ||
| + | |- | ||
| + | !Onboard rollbars | ||
| + | !Onboard brake bias | ||
| + | !Pit limiter | ||
| + | !Weight distribution | ||
| + | |- | ||
| + | |no | ||
| + | |no | ||
| + | |yes | ||
| + | |48/52 | ||
| + | |- | ||
| + | !Turbo | ||
| + | !Headlights | ||
| + | !Wheelbase | ||
| + | ! | ||
| + | |- | ||
| + | |no | ||
| + | |no | ||
| + | |2.06m | ||
| + | | | ||
|- | |- | ||
|} | |} | ||
Текущая версия на 08:20, 20 марта 2024


Содержание
- 1 ARC Camaro
- 2 Copa Classic B Tier 1
- 3 Copa Classic FL Tier 2
- 4 Copa Fusca
- 5 Copa Montana
- 6 Copa Trucks
- 7 Lancer RS
- 8 Mini JCW UK
- 9 Chevrolet Opala Old Stock Race
- 10 Formula Junior
- 11 Formula Vintage
- 12 German Group A
- 13 Formula Vee
- 14 Formula Retro
- 15 Formula Trainer
- 16 GT1
- 17 DPI
- 18 GTE
- 19 GT3
- 20 Hot Cars
- 21 P1 Gen 1
- 22 P1 Gen 2
- 23 BMW M1 Procar
- 24 RX
- 25 Vintage Touring Cars Tier 1
- 26 Vintage Touring Cars Tier 2
- 27 GT Classics
- 28 Street Cars
- 29 TSI Cup
- 30 Kart
- 31 Kart Cross
ARC Camaro[править]
| |||
| Displacement | Power | Torque | Transmission |
|---|---|---|---|
| 1.30l | 119hp | 115Nm | 6 speed Seqiential |
| Electronics | Boost | DRS | Weight |
| no | no | no | 595kg |
| Onboard rollbars | Onboard brake bias | Pit limiter | Weight distribution |
| no | no | yes | 53.0/47.0 |
| Turbo | Headlights | Wheelbase | |
| no | no | 1.84m |
Copa Classic B Tier 1[править]
Chevrolet Chevette[править]
| |||
| Displacement | Power | Torque | Transmission |
|---|---|---|---|
| 1.60l | 123hp | 125Nm | 5 speed H-Pattern |
| Electronics | Boost | DRS | Weight |
| no | no | no | 900kg |
| Onboard rollbars | Onboard brake bias | Pit limiter | Weight distribution |
| no | no | yes | 53.8/46.2 |
| Turbo | Headlights | Wheelbase | |
| no | yes | 2.40m |
Uno Classic B[править]
| |||
| Displacement | Power | Torque | Transmission |
|---|---|---|---|
| 1.60l | 127hp | 130Nm | 5 speed H-Pattern |
| Electronics | Boost | DRS | Weight |
| no | no | no | 860kg |
| Onboard rollbars | Onboard brake bias | Pit limiter | Weight distribution |
| no | no | yes | 62.8/37.2 |
| Turbo | Headlights | Wheelbase | |
| no | yes | 2.35m |
Gol Classic B[править]
| |||
| Displacement | Power | Torque | Transmission |
|---|---|---|---|
| 1.60l | 120hp | 123Nm | 5 speed H-Pattern |
| Electronics | Boost | DRS | Weight |
| no | no | no | 880kg |
| Onboard rollbars | Onboard brake bias | Pit limiter | Weight distribution |
| no | no | yes | 62.8/37.2 |
| Turbo | Headlights | Wheelbase | |
| no | yes | 2.37m |
Passat Classic B[править]
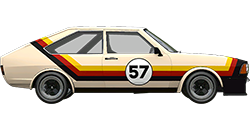
| |||
| Displacement | Power | Torque | Transmission |
|---|---|---|---|
| 1.60l | 120hp | 123Nm | 5 speed H-Pattern |
| Electronics | Boost | DRS | Weight |
| no | no | no | 920kg |
| Onboard rollbars | Onboard brake bias | Pit limiter | Weight distribution |
| no | no | yes | 62.8/37.2 |
| Turbo | Headlights | Wheelbase | |
| no | yes | 2.43m |
Puma GTE[править]
| |||
| Displacement | Power | Torque | Transmission |
|---|---|---|---|
| 1.60l | 123hp | 131Nm | 4 speed H-Pattern |
| Electronics | Boost | DRS | Weight |
| no | no | no | 900kg |
| Onboard rollbars | Onboard brake bias | Pit limiter | Weight distribution |
| no | no | yes | 42.0/58.0 |
| Turbo | Headlights | Wheelbase | |
| no | yes | 2.15m |
Copa Classic FL Tier 2[править]
Fusca FL[править]

| |||
| Power | Weight | Torque | Transmission |
|---|---|---|---|
| 170hp | 920kg | 180Nm | 4 speed H-Pattern |
| Electronics | Turbo | Boost | DRS |
| no | no | no | no |
| Onboard rollbars | Onboard brake bias | Pit limiter | Headlights |
| no | no | yes | no |
Gol Classic FL[править]
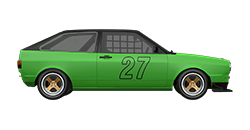
| |||
| Power | Weight | Torque | Transmission |
|---|---|---|---|
| 170hp | 880kg | 200Nm | 4 speed H-Pattern |
| Electronics | Turbo | Boost | DRS |
| no | no | no | no |
| Onboard rollbars | Onboard brake bias | Pit limiter | Headlights |
| no | no | yes | yes |
Passat Classic FL[править]
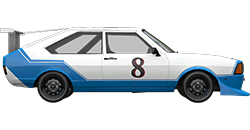
| |||
| Power | Weight | Torque | Transmission |
|---|---|---|---|
| 170hp | 925kg | 200Nm | 5 speed H-Pattern |
| Electronics | Turbo | Boost | DRS |
| no | no | no | no |
| Onboard rollbars | Onboard brake bias | Pit limiter | Headlights |
| no | no | yes | yes |
Puma GTB[править]
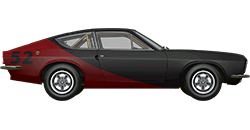
| |||
| Power | Weight | Torque | Transmission |
|---|---|---|---|
| 190hp | 1080kg | 300Nm | 4 speed H-Pattern |
| Electronics | Turbo | Boost | DRS |
| no | no | no | no |
| Onboard rollbars | Onboard brake bias | Pit limiter | Headlights |
| no | no | yes | yes |
Copa Fusca[править]

| |||
| Displacement | Power | Torque | Transmission |
|---|---|---|---|
| 1.60l | 123hp | 131Nm | 4 speed H-Pattern |
| Electronics | Boost | DRS | Weight |
| no | no | no | 830kg |
| Onboard rollbars | Onboard brake bias | Pit limiter | Weight distribution |
| no | no | yes | 40.0/60.0 |
| Turbo | Headlights | Wheelbase | |
| no | yes | 2.40m |
Copa Montana[править]

| |||
| Displacement | Power | Torque | Transmission |
|---|---|---|---|
| 5.70l | 369hp | 499Nm | 5 speed Seqiential |
| Electronics | Boost | DRS | Weight |
| no | with rules | no | 1360kg |
| Onboard rollbars | Onboard brake bias | Pit limiter | Weight distribution |
| yes | yes | yes | 50.6/49.4 |
| Turbo | Headlights | Wheelbase | |
| no | no | 2.66m |
Copa Trucks[править]
Iveco Stralis[править]
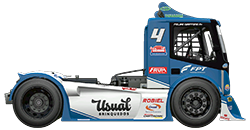
| |||
| Displacement | Power | Torque | Transmission |
|---|---|---|---|
| 12.90l | 1230hp | 3700Nm | 5 speed Seqiential |
| Electronics | Boost | DRS | Weight |
| no | no | no | 4800kg |
| Onboard rollbars | Onboard brake bias | Pit limiter | Weight distribution |
| no | no | yes | 56.2/43.8 |
| Turbo | Headlights | Wheelbase | |
| yes | no | 3.30m |
MAN TGX[править]
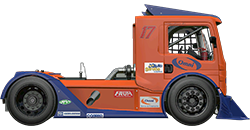
| |||
| Displacement | Power | Torque | Transmission |
|---|---|---|---|
| 12.40l | 1210hp | 3700Nm | 5 speed Seqiential |
| Electronics | Boost | DRS | Weight |
| no | no | no | 4820kg |
| Onboard rollbars | Onboard brake bias | Pit limiter | Weight distribution |
| no | no | yes | 55.8/44.2 |
| Turbo | Headlights | Wheelbase | |
| yes | no | 3.35m |
Mercedes-Benz Actros[править]
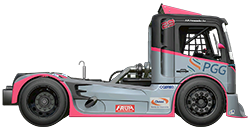
| |||
| Displacement | Power | Torque | Transmission |
|---|---|---|---|
| 12.80l | 1290hp | 3850Nm | 5 speed Seqiential |
| Electronics | Boost | DRS | Weight |
| no | no | no | 4950kg |
| Onboard rollbars | Onboard brake bias | Pit limiter | Weight distribution |
| no | no | yes | 53.8/46.2 |
| Turbo | Headlights | Wheelbase | |
| yes | no | 3.30m |
Vulkan Truck[править]
| |||
| Displacement | Power | Torque | Transmission |
|---|---|---|---|
| 12.00l | 1200hp | 3650Nm | 5 speed Seqiential |
| Electronics | Boost | DRS | Weight |
| no | no | no | 4900kg |
| Onboard rollbars | Onboard brake bias | Pit limiter | Weight distribution |
| no | no | yes | 55.8/44.2 |
| Turbo | Headlights | Wheelbase | |
| yes | no | 3.35m |
Volkswagen Constellation[править]
| |||
| Displacement | Power | Torque | Transmission |
|---|---|---|---|
| 9.40l | 1150hp | 3500Nm | 5 speed Seqiential |
| Electronics | Boost | DRS | Weight |
| no | no | no | 4820kg |
| Onboard rollbars | Onboard brake bias | Pit limiter | Weight distribution |
| no | no | yes | 55.8/44.2 |
| Turbo | Headlights | Wheelbase | |
| yes | no | 3.35m |
Lancer RS[править]
Mitsubishi Lancer RS[править]
| |||
| Power | Weight | Torque | Transmission |
|---|---|---|---|
| 330hp | 1490kg | 320Nm | 6 Sequental |
| Electronics | Turbo | Boost | DRS |
| ABS TC | yes | no | no |
| Onboard roll bars | Onboard brake bias | Pit limiter | Headlights |
| no | no | no | no |
Mini JCW UK[править]
| |||
| Displacement | Power | Torque | Transmission |
|---|---|---|---|
| 2.00l | 278hp | 351Nm | 6 speed Seqiential |
| Electronics | Boost | DRS | Weight |
| ABS | no | no | 1160kg |
| Onboard rollbars | Onboard brake bias | Pit limiter | Weight distribution |
| yes | no | yes | 61/39 |
| Turbo | Headlights | Wheelbase | |
| yes | no | 2.49m |
Chevrolet Opala Old Stock Race[править]

| |||
| Displacement | Power | Torque | Transmission |
|---|---|---|---|
| 4.10l | 293hp | 415Nm | 5 speed H-Pattern |
| Electronics | Boost | DRS | Weight |
| no | no | no | 1100kg |
| Onboard rollbars | Onboard brake bias | Pit limiter | Weight distribution |
| no | no | yes | 55/45 |
| Turbo | Headlights | Wheelbase | |
| no | no | 2.67m |
Formula Junior[править]

| |||
| Displacement | Power | Torque | Transmission |
|---|---|---|---|
| 1.0l | 126hp | 116Nm | 4 speed H-Pattern |
| Electronics | Boost | DRS | Weight |
| no | no | no | 483kg |
| Onboard rollbars | Onboard brake bias | Pit limiter | Weight distribution |
| no | no | yes | 44.0/56.0 |
| Turbo | Headlights | Wheelbase | |
| no | no | 2.31m |
Formula Vintage[править]
Gen Model 1[править]
| |||
| Power | Weight | Torque | Transmission |
|---|---|---|---|
| 420hp | 595kg | 240Nm | 5 speed |
| Electronics | Turbo | Boost | DRS |
| no | no | no | no |
| Onboard rollbars | Onboard brake bias | Pit limiter | Headlights |
| no | no | yes | no |
Gen Model 2[править]
| |||
| Power | Weight | Torque | Transmission |
|---|---|---|---|
| 450hp | 630kg | 245Nm | 5 speed |
| Electronics | Turbo | Boost | DRS |
| no | no | no | no |
| Onboard rollbars | Onboard brake bias | Pit limiter | Headlights |
| no | no | yes | no |
German Group A[править]
Mercedes-Benz 190E 2.5-16 Evo II DTM[править]
| |||
| Displacement | Power | Torque | Transmission |
|---|---|---|---|
| 2.50l | 340hp | 303Nm | 5 speed H-Pattern |
| Electronics | Boost | DRS | Weight |
| ABS | no | no | 1070kg |
| Onboard rollbars | Onboard brake bias | Pit limiter | Weight distribution |
| yes | yes | yes | 51.6/48.4 |
| Turbo | Headlights | Wheelbase | |
| no | yes | 2.66m |
BMW M3 Sport Evo Group A[править]
| |||
| Displacement | Power | Torque | Transmission |
|---|---|---|---|
| 2.50l | 328hp | 300Nm | 5 speed H-Pattern |
| Electronics | Boost | DRS | Weight |
| ABS | no | no | 1040kg |
| Onboard rollbars | Onboard brake bias | Pit limiter | Weight distribution |
| yes | yes | yes | 51.4/48.6 |
| Turbo | Headlights | Wheelbase | |
| no | yes | 2.57m |
Formula Vee[править]
Formula Vee[править]

| |||
| Displacement | Power | Torque | Transmission |
|---|---|---|---|
| 1.60l | 93hp | 159Nm | 4 speed H-Pattern |
| Electronics | Boost | DRS | Weight |
| no | no | no | 530kg |
| Onboard rollbars | Onboard brake bias | Pit limiter | Weight distribution |
| no | no | yes | 0.47/0.53 |
| Turbo | Headlights | Wheelbase | |
| no | no | 2.27m |
Formula Vee Fin[править]

| |||
| Displacement | Power | Torque | Transmission |
|---|---|---|---|
| 1.60l | 93hp | 159Nm | 4 speed H-Pattern |
| Electronics | Boost | DRS | Weight |
| no | no | no | 530kg |
| Onboard rollbars | Onboard brake bias | Pit limiter | Weight distribution |
| no | no | yes | 0.47/0.53 |
| Turbo | Headlights | Wheelbase | |
| no | no | 2.27m |
Formula Retro[править]
Gen 1[править]
Brabham BT44[править]
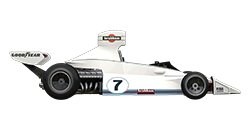
| |||
| Power | Weight | Torque | Transmission |
|---|---|---|---|
| 475hp | 650kg | 265Nm | 5 speed H-Pattern |
| Electronics | Turbo | Boost | DRS |
| no | no | no | no |
| Onboard rollbars | Onboard brake bias | Pit limiter | Headlights |
| no | yes | no | no |
Formula Retro V12[править]
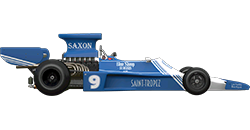
| |||
| Power | Weight | Torque | Transmission |
|---|---|---|---|
| 490hp | 670kg | 305Nm | 5 speed H-Pattern |
| Electronics | Turbo | Boost | DRS |
| no | no | no | no |
| Onboard rollbars | Onboard brake bias | Pit limiter | Headlights |
| no | yes | no | no |
Formula Retro V8[править]
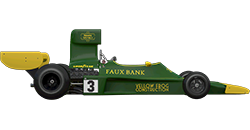
| |||
| Power | Weight | Torque | Transmission |
|---|---|---|---|
| 474hp | 575kg | 261Nm | 5 speed H-Pattern |
| Electronics | Turbo | Boost | DRS |
| no | no | no | no |
| Onboard rollbars | Onboard brake bias | Pit limiter | Headlights |
| no | yes | no | no |
Lotus Type 72E[править]
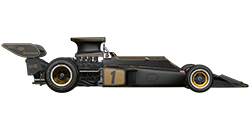
| |||
| Power | Weight | Torque | Transmission |
|---|---|---|---|
| 480hp | 640kg | 265Nm | 5 speed H-Pattern |
| Electronics | Turbo | Boost | DRS |
| no | no | no | no |
| Onboard rollbars | Onboard brake bias | Pit limiter | Headlights |
| no | yes | no | no |
McLaren M23[править]

| |||
| Power | Weight | Torque | Transmission |
|---|---|---|---|
| 475hp | 655kg | 265Nm | 5 speed H-Pattern |
| Electronics | Turbo | Boost | DRS |
| no | no | no | no |
| Onboard rollbars | Onboard brake bias | Pit limiter | Headlights |
| no | yes | no | no |
Formula Trainer[править]
Formula Trainer[править]

| |||
| Displacement | Power | Torque | Transmission |
|---|---|---|---|
| 1.60l | 113hp | 158Nm | 4 speed Sequential |
| Electronics | Boost | DRS | Weight |
| no | no | no | 495kg |
| Onboard rollbars | Onboard brake bias | Pit limiter | Weight distribution |
| no | no | yes | 0.45/0.55 |
| Turbo | Headlights | Wheelbase | |
| no | no | 2.53m |
Formula Trainer Advanced[править]
|
| |||
| Displacement | Power | Torque | Transmission |
|---|---|---|---|
| 1.60l | 155hp | 180Nm | 4 speed Sequential |
| Electronics | Boost | DRS | Weight |
| no | no | no | 495kg |
| Onboard rollbars | Onboard brake bias | Pit limiter | Weight distribution |
| no | no | yes | 0.45/0.55 |
| Turbo | Headlights | Wheelbase | |
| no | no | 2.53m |
GT1[править]
McLaren F1 GTR[править]
| |||
| Power | Weight | Torgue | Transmission |
|---|---|---|---|
| 600hp | 1042kg | 500Nm | 6 Sequental |
| Electronics | Turbo | Boost button | DRS |
| no | no | no | no |
| Onboard roll bars | Onboard brake bias | Pit limiter | Headlights |
| yes | yes | yes | yes |
Mercedes-Benz CLK LM[править]
| |||
| Power | Weight | Torgue | Transmission |
|---|---|---|---|
| 600hp | 1059kg | 489Nm | 6 Sequental |
| Electronics | Turbo | Boost button | DRS |
| no | no | no | no |
| Onboard roll bars | Onboard brake bias | Pit limiter | Headlights |
| yes | yes | yes | yes |
Porsche 911 GT1-98[править]
| |||
| Power | Weight | Torgue | Transmission |
|---|---|---|---|
| 580hp | 1052kg | 465Nm | 6 Sequental |
| Electronics | Turbo | Boost button | DRS |
| no | yes | no | no |
| Onboard roll bars | Onboard brake bias | Pit limiter | Headlights |
| yes | yes | yes | yes |
DPI[править]
Cadillac DPi-VR[править]
| |||
| Displacement | Power | Torque | Transmission |
|---|---|---|---|
| 5.50l | 582hp | 620Nm | 6 speed Sequential |
| Electronics | Boost | DRS | Weight |
| TC | no | no | 1015kg |
| Onboard rollbars | Onboard brake bias | Pit limiter | Weight distribution |
| no | yes | yes | 45.4/54.6 |
| Turbo | Headlights | Wheelbase | |
| no | yes | 2.96m |
GTE[править]
Chevrolet Corvette C8.R[править]

| |||
| Displacement | Power | Torque | Transmission |
|---|---|---|---|
| 5.50l | 526hp | 637Nm | 6 speed Sequential |
| Electronics | Boost | DRS | Weight |
| TC | no | no | 1328kg |
| Onboard rollbars | Onboard brake bias | Pit limiter | Weight distribution |
| no | yes | yes | 44.2/55.8 |
| Turbo | Headlights | Wheelbase | |
| no | yes | 2.72m |
BMW M8 GTE[править]
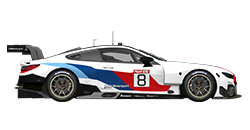
| |||
| Displacement | Power | Torque | Transmission |
|---|---|---|---|
| 3.98l | 551hp | 758Nm | 6 speed Sequential |
| Electronics | Boost | DRS | Weight |
| TC | no | no | 1320kg |
| Onboard rollbars | Onboard brake bias | Pit limiter | Weight distribution |
| no | yes | yes | 51.0/49.0 |
| Turbo | Headlights | Wheelbase | |
| no | yes | 2.86m |
Porsche 911 RSR GTE[править]
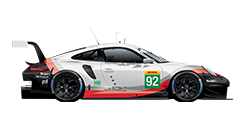
| |||
| Displacement | Power | Torque | Transmission |
|---|---|---|---|
| 4.19l | 528hp | 485Nm | 6 speed Sequential |
| Electronics | Boost | DRS | Weight |
| TC | no | no | 1328kg |
| Onboard rollbars | Onboard brake bias | Pit limiter | Weight distribution |
| no | yes | yes | 43.8/56.2 |
| Turbo | Headlights | Wheelbase | |
| no | yes | 2.51m |
GT3[править]
McLaren 720S GT3[править]
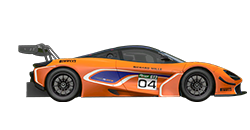
| |||
| Displacement | Power | Torque | Transmission |
|---|---|---|---|
| 3.80l | 519hp | 626Nm | 6 speed Sequential |
| Electronics | Boost | DRS | Weight |
| ABS TC | no | no | 1380kg |
| Onboard rollbars | Onboard brake bias | Pit limiter | Weight distribution |
| no | yes | yes | 44.0/56.0 |
| Turbo | Headlights | Wheelbase | |
| yes | yes | 2.70m |
Porsche 911 GT3 R[править]
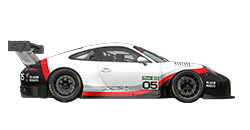
| |||
| Displacement | Power | Torque | Transmission |
|---|---|---|---|
| 4.00l | 512hp | 469Nm | 6 speed Sequential |
| Electronics | Boost | DRS | Weight |
| ABS TC | no | no | 1328kg |
| Onboard rollbars | Onboard brake bias | Pit limiter | Weight distribution |
| no | yes | yes | 42.2/57.8 |
| Turbo | Headlights | Wheelbase | |
| no | yes | 2.46m |
Mercedes AMG GT3[править]
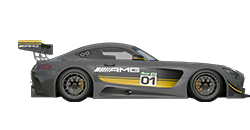
| |||
| Displacement | Power | Torque | Transmission |
|---|---|---|---|
| 6.21l | 521hp | 604Nm | 6 speed Sequential |
| Electronics | Boost | DRS | Weight |
| ABS TC | no | no | 1370kg |
| Onboard rollbars | Onboard brake bias | Pit limiter | Weight distribution |
| no | yes | yes | 44.0/56.0 |
| Turbo | Headlights | Wheelbase | |
| no | yes | 2.64m |
Nissan GT-R Nismo GT3[править]

| |||
| Displacement | Power | Torque | Transmission |
|---|---|---|---|
| 3.80l | 540hp | 659Nm | 6 speed Sequential |
| Electronics | Boost | DRS | Weight |
| ABS TC | no | no | 1385kg |
| Onboard rollbars | Onboard brake bias | Pit limiter | Weight distribution |
| no | yes | yes | 54.0/46.0 |
| Turbo | Headlights | Wheelbase | |
| yes | yes | 2.77m |
BMW M6 GT3[править]
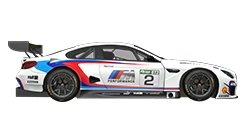
| |||
| Displacement | Power | Torque | Transmission |
|---|---|---|---|
| 4.39l | 520hp | 718Nm | 6 speed Sequential |
| Electronics | Boost | DRS | Weight |
| ABS TC | no | no | 1400kg |
| Onboard rollbars | Onboard brake bias | Pit limiter | Weight distribution |
| no | yes | yes | 52.0/48.0 |
| Turbo | Headlights | Wheelbase | |
| yes | yes | 2.88m |
Hot Cars[править]
Fusca 1 Hot Cars[править]
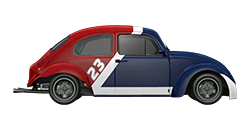
| |||
| Displacement | Power | Torque | Transmission |
|---|---|---|---|
| 1.60l | 160hp | 183Nm | 4 speed H-Pattern |
| Electronics | Boost | DRS | Weight |
| no | no | no | 760kg |
| Onboard rollbars | Onboard brake bias | Pit limiter | Weight distribution |
| no | no | yes | 38.2/61.8 |
| Turbo | Headlights | Wheelbase | Drive/Engine |
| no | no | 2.40m | RWD/Rear |
Fusca 2 Hot Cars[править]
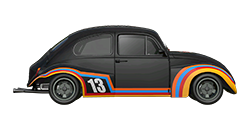
| |||
| Displacement | Power | Torque | Transmission |
|---|---|---|---|
| 1.60l | 160hp | 183Nm | 4 speed H-Pattern |
| Electronics | Boost | DRS | Weight |
| no | no | no | 760kg |
| Onboard rollbars | Onboard brake bias | Pit limiter | Weight distribution |
| no | no | yes | 38.0/62.0 |
| Turbo | Headlights | Wheelbase | |
| no | no | 2.40m |
Gol Hot Cars[править]
| |||
| Displacement | Power | Torque | Transmission |
|---|---|---|---|
| 1.60l | 160hp | 183Nm | 4 speed H-Pattern |
| Electronics | Boost | DRS | Weight |
| no | no | no | 775kg |
| Onboard rollbars | Onboard brake bias | Pit limiter | Weight distribution |
| no | no | yes | 62.8/37.2 |
| Turbo | Headlights | Wheelbase | |
| no | no | 2.37m |
Passat Hot Cars[править]
| |||
| Displacement | Power | Torque | Transmission |
|---|---|---|---|
| 1.80l | 165hp | 211Nm | 4 speed H-Pattern |
| Electronics | Boost | DRS | Weight |
| no | no | no | 785kg |
| Onboard rollbars | Onboard brake bias | Pit limiter | Weight distribution |
| no | no | yes | 63.0/37.0 |
| Turbo | Headlights | Wheelbase | |
| no | no | 2.43m |
P1 Gen 1[править]
Metalmoro AJR Chevy V8[править]
| |||
| Displacement | Power | Torque | Transmission |
|---|---|---|---|
| 6.20l | 594hp | 700Nm | 6 speed Seqiential |
| Electronics | Boost | DRS | Weight |
| ABS TC | no | yes | 960kg |
| Onboard rollbars | Onboard brake bias | Pit limiter | Weight distribution |
| yes | yes | yes | 42.0/58.0 |
| Turbo | Headlights | Wheelbase | |
| no | yes | 2.72m |
Metalmoro AJR Honda[править]
| |||
| Displacement | Power | Torque | Transmission |
|---|---|---|---|
| 2.40l | 579hp | 663Nm | 6 speed Seqiential |
| Electronics | Boost | DRS | Weight |
| ABS TC | no | yes | 935kg |
| Onboard rollbars | Onboard brake bias | Pit limiter | Weight distribution |
| yes | yes | yes | 42.8/57.2 |
| Turbo | Headlights | Wheelbase | |
| yes | yes | 2.72m |
Metalmoro AJR Judd[править]
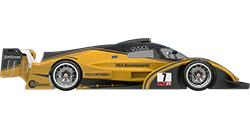
| |||
| Displacement | Power | Torque | Transmission |
|---|---|---|---|
| 4.20l | 556hp | 432Nm | 6 speed Seqiential |
| Electronics | Boost | DRS | Weight |
| no | no | no | 950kg |
| Onboard rollbars | Onboard brake bias | Pit limiter | Weight distribution |
| yes | yes | yes | 42.5/57.5 |
| Turbo | Headlights | Wheelbase | |
| no | yes | 2.72m |
Metalmoro AJR V6 Turbo[править]

| |||
| Displacement | Power | Torque | Transmission |
|---|---|---|---|
| 3.50l | 641hp | 579Nm | 6 speed Seqiential |
| Electronics | Boost | DRS | Weight |
| no | no | no | 960kg |
| Onboard rollbars | Onboard brake bias | Pit limiter | Weight distribution |
| yes | yes | yes | 42.4/57.6 |
| Turbo | Headlights | Wheelbase | |
| no | yes | 2.72m |
Ginetta G58[править]
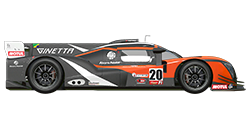
| |||
| Displacement | Power | Torque | Transmission |
|---|---|---|---|
| 6.20l | 564hp | 663Nm | 6 speed Seqiential |
| Electronics | Boost | DRS | Weight |
| ABS TC | no | no | 1020kg |
| Onboard rollbars | Onboard brake bias | Pit limiter | Weight distribution |
| yes | yes | yes | 46.0/54.0 |
| Turbo | Headlights | Wheelbase | |
| no | yes | 2.90m |
P1 Gen 2[править]
Metalmoro AJR Gen2 Chevrolet[править]
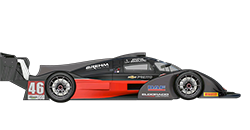
| |||
| Displacement | Power | Torque | Transmission |
|---|---|---|---|
| 6.20l | 593hp | 700Nm | 6 speed Seqiential |
| Electronics | Boost | DRS | Weight |
| ABS TC | no | yes | 1000kg |
| Onboard rollbars | Onboard brake bias | Pit limiter | Weight distribution |
| no | yes | yes | 40.0/60.0 |
| Turbo | Headlights | Wheelbase | |
| no | yes | 2.90m |
Metalmoro AJR Gen2 Honda[править]
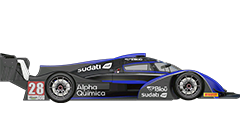
| |||
| Displacement | Power | Torque | Transmission |
|---|---|---|---|
| 2.40l | 575hp | 658Nm | 6 speed Seqiential |
| Electronics | Boost | DRS | Weight |
| ABS TC | no | yes | 1100kg |
| Onboard rollbars | Onboard brake bias | Pit limiter | Weight distribution |
| no | yes | yes | 40.0/60.0 |
| Turbo | Headlights | Wheelbase | |
| yes | yes | 2.90m |
Metalmoro AJR Gen2 Nissan[править]
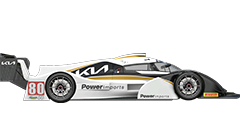
| |||
| Displacement | Power | Torque | Transmission |
|---|---|---|---|
| 5.60l | 561hp | 618Nm | 6 speed Seqiential |
| Electronics | Boost | DRS | Weight |
| no | no | yes | 1100kg |
| Onboard rollbars | Onboard brake bias | Pit limiter | Weight distribution |
| no | yes | yes | 40.0/60.0 |
| Turbo | Headlights | Wheelbase | |
| yes | yes | 2.90m |
Ginetta G58 Gen2[править]
|
| |||
| Displacement | Power | Torque | Transmission |
|---|---|---|---|
| 6.20l | 564hp | 663Nm | 6 speed Seqiential |
| Electronics | Boost | DRS | Weight |
| ABS TC | no | no | 1020kg |
| Onboard rollbars | Onboard brake bias | Pit limiter | Weight distribution |
| no | yes | yes | 46.0/54.0 |
| Turbo | Headlights | Wheelbase | |
| no | yes | 2.90m |
Sigma P1 G5[править]
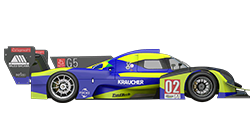
| |||
| Displacement | Power | Torque | Transmission |
|---|---|---|---|
| 6.90l | 573hp | 700Nm | 6 speed Seqiential |
| Electronics | Boost | DRS | Weight |
| ABS TC | no | yes | 1050kg |
| Onboard rollbars | Onboard brake bias | Pit limiter | Weight distribution |
| no | yes | yes | 40.0/60.0 |
| Turbo | Headlights | Wheelbase | |
| no | yes | 2.98m |
BMW M1 Procar[править]
BMW M1 Procar[править]
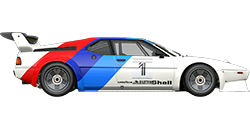
| |||
| Power | Weight | Torque | Transmission |
|---|---|---|---|
| 485hp | 1100kg | 307Nm | 5 speed H-Pattern |
| Electronics | Turbo | Boost | DRS |
| no | no | no | no |
| Onboard rollbars | Onboard brake bias | Pit limiter | Headlights |
| no | yes | yes | yes |
RX[править]
Citroen DS3 RX[править]

| |||
| Displacement | Power | Torque | Transmission |
|---|---|---|---|
| 2.00l | 595hp | 920Nm | 6 speed Seqiential |
| Electronics | Boost | DRS | Weight |
| no | no | no | 1300kg |
| Onboard rollbars | Onboard brake bias | Pit limiter | Weight distribution |
| no | no | yes | 52.0/48.0 |
| Turbo | Headlights | Wheelbase | |
| yes | no | 2.46m |
Mini Countryman R60 RX[править]
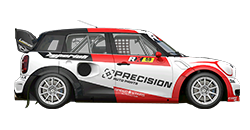
| |||
| Displacement | Power | Torque | Transmission |
|---|---|---|---|
| 2.00l | 595hp | 920Nm | 6 speed Seqiential |
| Electronics | Boost | DRS | Weight |
| no | no | no | 1300kg |
| Onboard rollbars | Onboard brake bias | Pit limiter | Weight distribution |
| no | no | yes | 52.0/48.0 |
| Turbo | Headlights | Wheelbase | |
| yes | no | 2.61m |
Mitsubishi Lancer Evo10 RX[править]

| |||
| Displacement | Power | Torque | Transmission |
|---|---|---|---|
| 2.00l | 595hp | 920Nm | 6 speed Seqiential |
| Electronics | Boost | DRS | Weight |
| no | no | no | 1300kg |
| Onboard rollbars | Onboard brake bias | Pit limiter | Weight distribution |
| no | no | yes | 52.0/48.0 |
| Turbo | Headlights | Wheelbase | |
| yes | no | 2.46m |
Volksagen Polo RX[править]
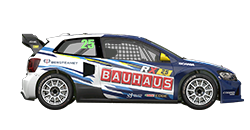
| |||
| Displacement | Power | Torque | Transmission |
|---|---|---|---|
| 2.00l | 595hp | 920Nm | 6 speed Seqiential |
| Electronics | Boost | DRS | Weight |
| no | no | no | 1300kg |
| Onboard rollbars | Onboard brake bias | Pit limiter | Weight distribution |
| no | no | yes | 52.0/48.0 |
| Turbo | Headlights | Wheelbase | |
| yes | no | 2.48m |
Vintage Touring Cars Tier 1[править]
BMW 2002 Turbo[править]
| |||
| Displacement | Power | Torque | Transmission |
|---|---|---|---|
| 1.99l | 197hp | 256Nm | 5 speed H-Pattern |
| Electronics | Boost | DRS | Weight |
| no | no | no | 1072kg |
| Onboard rollbars | Onboard brake bias | Pit limiter | Weight distribution |
| no | no | yes | 50.5/49.5 |
| Turbo | Headlights | Wheelbase | |
| yes | yes | 2.51m |
Vintage Touring Cars Tier 2[править]
Mini Cooper S 1965[править]

| |||
| Displacement | Power | Torque | Transmission |
|---|---|---|---|
| 1.27l | 108hp | 138Nm | 4 speed H-Pattern |
| Electronics | Boost | DRS | Weight |
| no | no | no | 700kg |
| Onboard rollbars | Onboard brake bias | Pit limiter | Weight distribution |
| no | no | yes | 61.0/39.0 |
| Turbo | Headlights | Wheelbase | |
| no | yes | 2.03m |
Lotus 23[править]
| |||
| Displacement | Power | Torque | Transmission |
|---|---|---|---|
| 1.10l | 95hp | 105Nm | 4 speed H-Pattern |
| Electronics | Boost | DRS | Weight |
| no | no | no | 540kg |
| Onboard rollbars | Onboard brake bias | Pit limiter | Weight distribution |
| no | no | yes | 42.0/58.0 |
| Turbo | Headlights | Wheelbase | |
| no | yes | 2.29m |
GT Classics[править]
Porsche 911 RSR 74[править]
| |||
| Power | Weight | Torque | Transmission |
|---|---|---|---|
| 330hp | 980kg | 314Nm | 5 speed H-Pattern |
| Electronics | Turbo | Boost | DRS |
| no | no | no | no |
| Onboard rollbars | Onboard brake bias | Pit limiter | Headlights |
| no | yes | yes | yes |
Chevrolet Corvette C3[править]
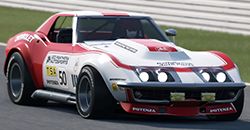
| |||
| Power | Weight | Torque | Transmission |
|---|---|---|---|
| 540hp | 1380kg | 530Nm | 4 speed H-Pattern |
| Electronics | Turbo | Boost | DRS |
| no | no | no | no |
| Onboard rollbars | Onboard brake bias | Pit limiter | Headlights |
| no | no | yes | yes |
Street Cars[править]
Chevrolet Camaro SS[править]

| |||
| Displacement | Power | Torque | Transmission |
|---|---|---|---|
| 6.20l | 446hp | 596Nm | 6 speed H-Pattern |
| Electronics | Boost | DRS | Weight |
| ABS TC | no | no | 1751kg |
| Onboard rollbars | Onboard brake bias | Pit limiter | Weight distribution |
| no | no | yes | 56.5/43.5 |
| Turbo | Headlights | Wheelbase | |
| no | yes | 2.81m |
TSI Cup[править]
VW Virtus GTS[править]

| |||
| Displacement | Power | Torque | Transmission |
|---|---|---|---|
| 1.00l | 148hp | 255Nm | 6 speed Seqiential |
| Electronics | Boost | DRS | Weight |
| ABS TC | no | no | 1340kg |
| Onboard rollbars | Onboard brake bias | Pit limiter | Weight distribution |
| no | no | yes | 53.0/47.0 |
| Turbo | Headlights | Wheelbase | |
| yes | yes | 2.65m |
Kart[править]
125CC[править]
| |||
| Displacement | Power | Torque | Transmission |
|---|---|---|---|
| 0.13l | 32hp | 21Nm | 1 speed Seqiential |
| Electronics | Boost | DRS | Weight |
| no | no | no | 155kg |
| Onboard rollbars | Onboard brake bias | Pit limiter | Weight distribution |
| no | no | yes | 43.2/56.8 |
| Turbo | Headlights | Wheelbase | |
| no | no | 1.04m |
GX390 Race[править]
| |||
| Displacement | Power | Torque | Transmission |
|---|---|---|---|
| 0.39l | 11hp | 25Nm | 1 speed Seqiential |
| Electronics | Boost | DRS | Weight |
| no | no | no | 170kg |
| Onboard rollbars | Onboard brake bias | Pit limiter | Weight distribution |
| no | no | yes | 42.4/57.6 |
| Turbo | Headlights | Wheelbase | |
| no | no | 1.03m |
GX390 Rental[править]
| |||
| Displacement | Power | Torque | Transmission |
|---|---|---|---|
| 0.39l | 12hp | 25Nm | 1 speed Seqiential |
| Electronics | Boost | DRS | Weight |
| no | no | no | 190kg |
| Onboard rollbars | Onboard brake bias | Pit limiter | Weight distribution |
| no | no | yes | 42.4/57.6 |
| Turbo | Headlights | Wheelbase | |
| no | no | 1.03m |
125cc Shifter[править]
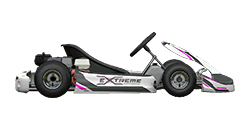
| |||
| Displacement | Power | Torque | Transmission |
|---|---|---|---|
| 0.13l | 34hp | 22Nm | 6 speed Seqiential |
| Electronics | Boost | DRS | Weight |
| no | no | no | 155kg |
| Onboard rollbars | Onboard brake bias | Pit limiter | Weight distribution |
| no | no | yes | 42.2/57.8 |
| Turbo | Headlights | Wheelbase | |
| no | no | 1.03m |
Superkart 250cc[править]
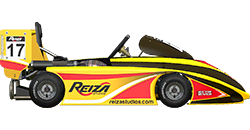
| |||
| Displacement | Power | Torque | Transmission |
|---|---|---|---|
| 0.25l | 93hp | 53Nm | 6 speed Seqiential |
| Electronics | Boost | DRS | Weight |
| no | no | no | 220kg |
| Onboard rollbars | Onboard brake bias | Pit limiter | Weight distribution |
| no | no | yes | 42.2/57.8 |
| Turbo | Headlights | Wheelbase | |
| no | no | 1.04m |
Kart Cross[править]
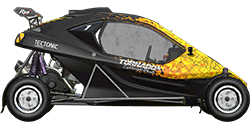
| |||
| Displacement | Power | Torque | Transmission |
|---|---|---|---|
| 0.60l | 133hp | 90Nm | 6 Speed Seqiential |
| Electronics | Boost | DRS | Weight |
| no | no | no | 425kg |
| Onboard rollbars | Onboard brake bias | Pit limiter | Weight distribution |
| no | no | yes | 48/52 |
| Turbo | Headlights | Wheelbase | |
| no | no | 2.06m |